Since Print2Email version 11.60, Print2Email uses industry-standard OAuth 2.0 authorization to send emails with Gmail email provider.
In case of the OAuth 2.0 authorization is not suitable for you, you can configure Print2Email to use the Gmail SMTP server by performing the following steps:
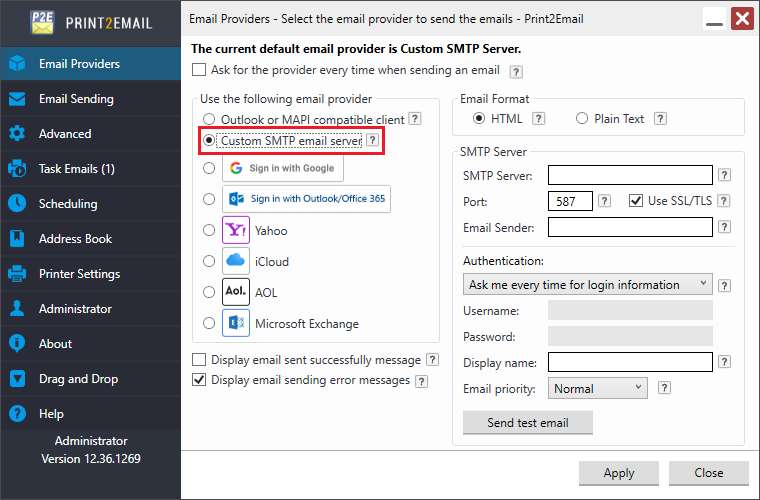
In Print2Email > Email Providers, select the Custom SMTP email server option.
Please configure the Gmail SMTP Server as on the following image:
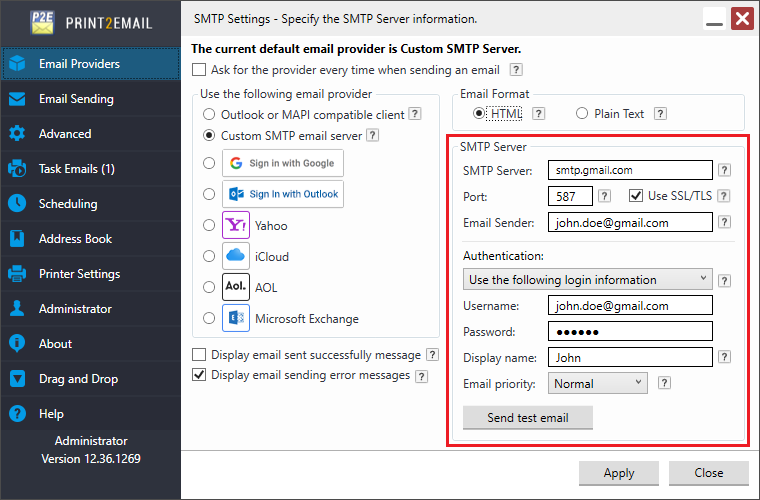
Please configure the SMTP Settings as the following:
SMTP Server must be smtp.gmail.com
SMTP Port must be 587
Check the Use SSL\TLS checkbox
Email Sender and Username must be the User’s Gmail account name, for example, MyAccount@gmail.com
Password must be the User’s password for the Gmail account.
Please try to send an email using “Send test email” with Gmail settings to verify that the email sending is working correctly.
Please save the changes by Pressing Apply.
Please note, that the “Allow Less Secure Apps” option must be enabled in your Gmail account.
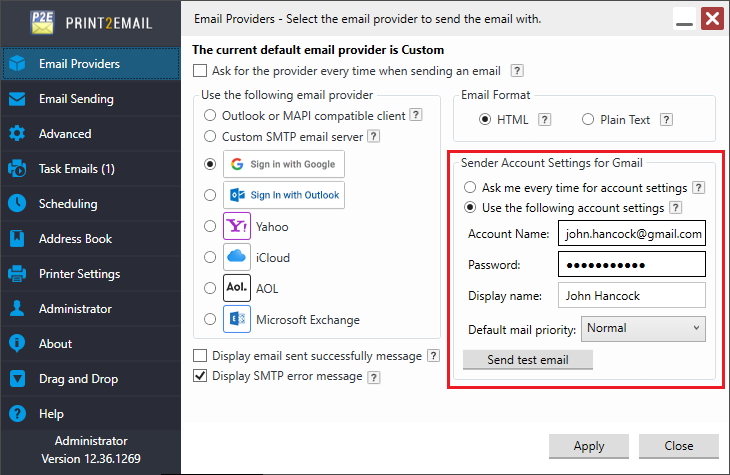
Please find an alternative solution below for using the current predefined Gmail provider without OAuth 2.0 authorization with standard Gmail accounts.
Please note that google phasing out “Allow Less Secure Apps” to prevent sending emails without OAuth 2.0 authorization.
Please edit the Print2Email INI configuration file in the Print2Email installation directory.
By default, the Print2Email INI file is in the following location:
On Windows Desktop:
c:\Program Files\Black Ice Software LLC\Print2Email\Print2Email.ini
On Windows Server:
c:\Program Files\Black Ice Software LLC\Print2Email\Print2EmailServer.ini
Open the INI file with any text editor, such as Notepad.
Add the Use Gmail OAuth2=0 line under the [General Settings] text, as in the following example:
[General Settings]
Use Gmail OAuth2=0
Save the INI file, then restart the Print2Email to apply the changes.
From now on, Print2Email will use the predefined Gmail provider without OAuth 2.0 authorization, where you’ll have to provide your Google Account email and password manually.