When logging into the Server, Print2RDP adds its printers and sets the default printer as specified in the Print2RDP Client. Then Windows Server begins searching for compatible printers on the client workstation and adds them to the Server.
If one of the printers added to the Server is the default printer for the local user on the client machine, it will be set to be the default on the Server, overriding any default printer that Print2RDP sets. To correct this, perform the following steps:
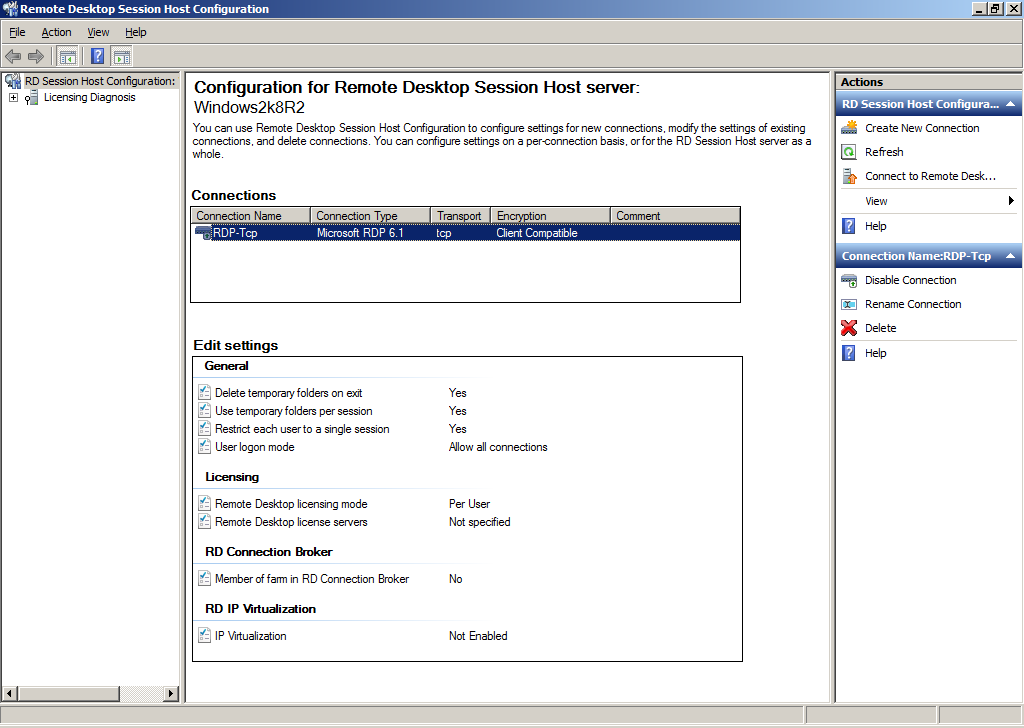
1. Open the Control Panel > Administrative Tools and select Remote Desktop Services.
2. Select Remote Desktop Session Host Configuration.

3. In the middle pane, under Connections, right click on RDP-Tcp and click Properties.
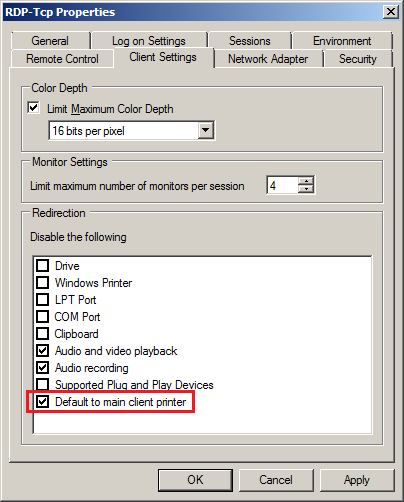
4. Click the Client Settings tab in the RDP-Tcp Properties dialog and make sure the checkbox for Default to main client printer is checked.