Print2RDP lets Administrators assign third-party Windows drivers to selected printers that need their own drivers to function properly.
To use a Windows driver with a printer instead of the default Print2RDP driver, click the Assign Driver to a Printer button on the Printer Drivers tab:
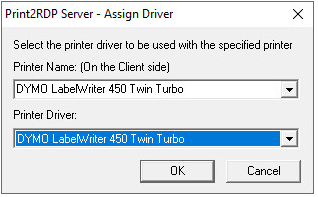
In the Assign Driver driver dialog, select the Printer and the Driver you want to use with the Printer.
The name of the printer must be specified exactly as it appears on the client-side, without any session IDs or other suffixes.
The Printer Name can be typed in, or selected from a list of printers that have been attached to the printer server previously.
Print2RDP lists all the suitable printer drivers that are installed on the server. For an example of how to install a printer driver to the server, please see the Installing the DYMO drivers section below.

After changing Printer Driver assignments, the users of the printer must log off and log back into the server for the changes to take effect.
Printers that do not have any assigned drivers will use the default Print2RDP drivers.
To remove an assignment, click the Delete Selected Assignment button.
A common example of a printer that needs to use its own driver is a DYMO label printer. DYMO applications will not recognize the DYMO label printers if the default Print2RDP printer drivers are used, so the DYMO printer drivers must be assigned to the DYMO printers. The following is an example of how to install the DYMO printer drivers to a print server.
Installing the DYMO drivers:
Download and install the DYMO driver packages from the following links:
For 64 bit systems: http://download.dymo.com/dymo/Software/Download%20Drivers/LabelWriter/Downloads/1/LabelWriterDrivers-x64.msi
For 32 bit systems: http://download.dymo.com/dymo/Software/Download%20Drivers/LabelWriter/Downloads/1/LabelWriterDrivers-x86.msi
These installers will install the driver packages but not the drivers.
To install the drivers, open Control Panel > Devices and Printers
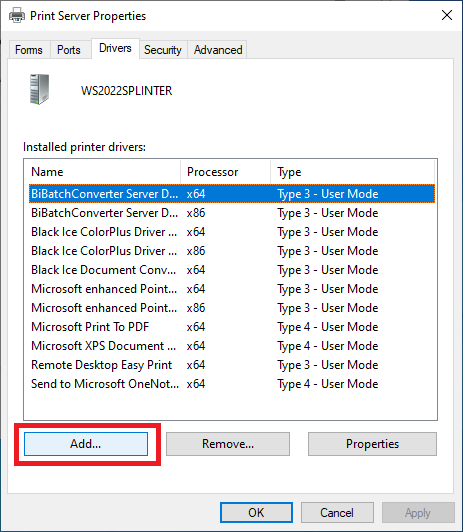
Select any printer and click on Print server properties.

Go to the Drivers tab and click on Add.
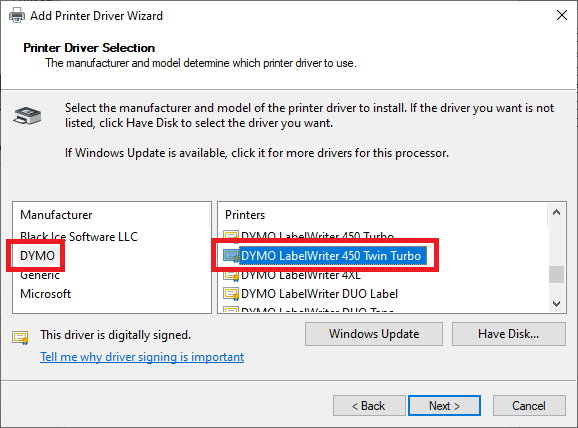
Select x64 if you are installing to a 64-bit system, x86 if you are installing to a 32-bit system.

Select the driver that has the same model number that your printer has. Click Next to finish the wizard.
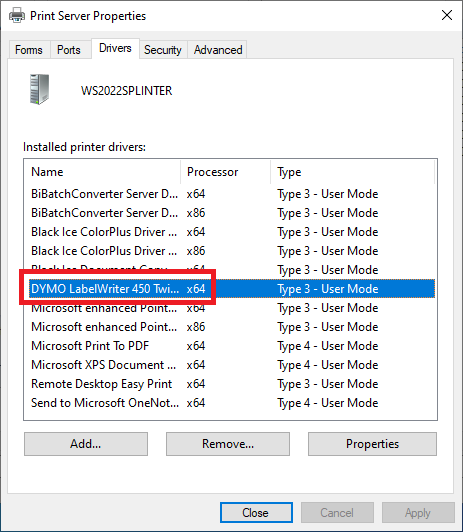
You should see the DYMO driver in the driver list after finishing the wizard.
After installing the DYMO driver, it should be selectable in the Print2RDP “Assign Driver” dialog. log in as Administrator and start Print2RDP Server.
Go to the Printer Drivers tab > Click Assign Driver to a Printer
Enter the exact name of your printer as it appears on the client-side and select the DYMO Printer Driver.
Click OK on the Print2RDP Server Properties to save the settings.
Log off and Log back on to the server for the changes to take effect.
After logging on again, Print2RDP will use the DYMO drivers for the DYMO printer and the DYMO Label and DYMO Connect applications will be usable.