View an online tutorial demonstrating how to manually import contact information
This option lets you quickly import contacts from a database or purchased fax list into a Fax list in the Broadcast software. In order to import a fax list into the Broadcast software it must be an ASCII text file (.TXT) or a Comma-Separated Values file (.CSV). You can use one of three delimiters, comma separated format (CSV), space delimited and tab delimited. The delimiter type specifies the layout of the text file so that the Broadcast software is able to import the information into the Fax list in the correct format. Comma separated is the most widely used and is recommended.
Most databases on the market, such as ACT! and Goldmine, allow you to export customer information into a text file. They will even let you specify the delimiter type. Microsoft Excel and Access are also common programs used to maintain customer data lists and will allow you to export out information into a text file. It is also common to purchase a fax list from a third party. In most cases you can specify the format of the file before you purchase the list. After you have the text file with one of the above delimiters, you are ready to import the data into the Broadcast software.
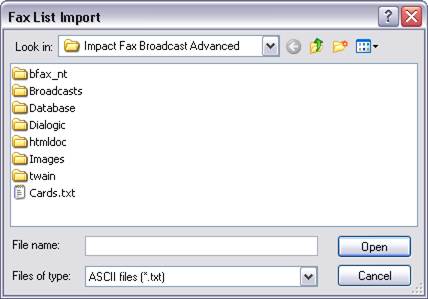
To begin the Import procedure, select the Fax List Management option from the menu bar at the top of the Broadcast software. Scroll down and select Import Fax List. The following screen will open:
As it was mentioned above, the file must be an ASCII text file or Comma-separated value file. You can look for files based on the file type by toggling the option in the Files of type drop down box. Browse to the location of the file you wish to import into the Broadcast Software. Select the file and press Open. Please note: If ASCII files (.txt) is selected as the file type, the following dialog box will appear:
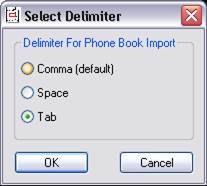
You must specify the type of delimiter used in the text file that you want to import into the Broadcast software. Check the delimiter type and press OK to continue.
The following screen will appear next:
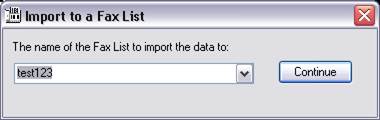
The next step is to determine what fax list you want to import the data into. You can create a new fax list or you can use an existing fax list. To create a new fax list for the contacts, type a name for the fax list in the appropriate field. If you want to use an existing fax list, select the desired fax list from the drop down box.
Press Next to proceed. The following screen will open:
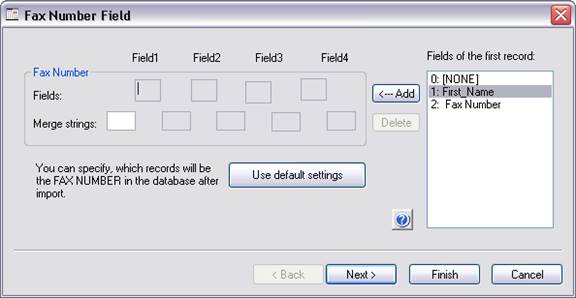
Importing contacts is handled through a wizard style interface. The screen above is the first screen in the wizard.
In this step you need to map the information in the text file to the correct field in the Broadcast fax list. On the left hand side of the Fax Number Field window, you see the Fax number field. On the right hand side, you see the information from the first record in the text file. To map a field, highlight the information in the Fields of the first record window and press the ßAdd button. In the example above, you can see that the fax number is (Fax Number) is next to the #2 in the Fields of the first record window. As a result, you highlight FAX_PHONE by clicking on it and press the arrow on the left. The #2 was added to the Name field. As you can see above, there may be many pieces of information and you may or may not want to map the field. If you do not want to map the field, enter a “0” in the field. If the Use default settings button is pressed, the default mapping settings will be used. Press Next to continue to the next field. You can map the following pieces of information and each field has a separate mapping window. Repeat the step above and keep pressing Next to progress through the wizard.
The following fields can be mapped:
· Fax Number: The contact’s fax number.
· Name: The contact’s name.
· Company Name: The contact’s company name.
· Title: The contact’s title.
· Department: The contact’s department name.
· Address Line 1: The contact’s address line 1.
· Address Line 2: The contact’s address line 2.
· City: The contact’s city name.
· State: The contact’s state name.
· Zip Code: The contact’s zip code.
· Phone Number: The contact’s phone number.
· E-mail Address: The contact’s e-mail address.
· Number of Faxes Sent: Number of faxes that were sent to this contact.
· Last Date Sent: Date that the last fax was sent to this contact.
The E-mail Address screen is the last of the screens that need to be mapped. When you press next, the wizard will advance to the following screen:
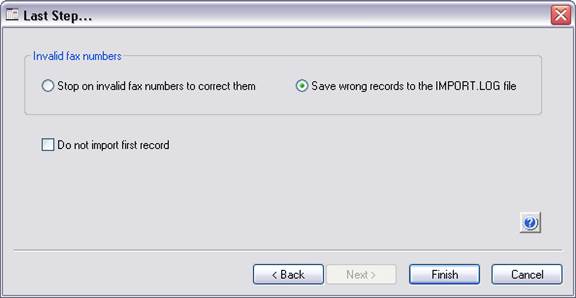
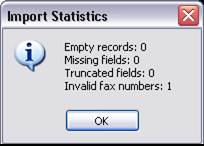
This screen gives you the option of stopping the import procedure on every invalid fax detected or simply save the invalid fax numbers detected to the IMPORT.LOG file. Saving the invalid to the log file is much quicker and is recommended. You can access the log file at any time and correct the invalid fax numbers. There is also an option to Do not import first record. This option is useful if your database’s first record contains place holders, not actual contact information. For example, if the first record contains fields such as Name, Company, etc., instead of the actual values such as John Doe, Doe industries, etc. Press Finish to complete the import procedure. The following window will appear, showing statistics of the import process:
When finished importing, go to the Impact Fax Broadcast > Fax List Management > Manage Fax Lists to see the imported list.