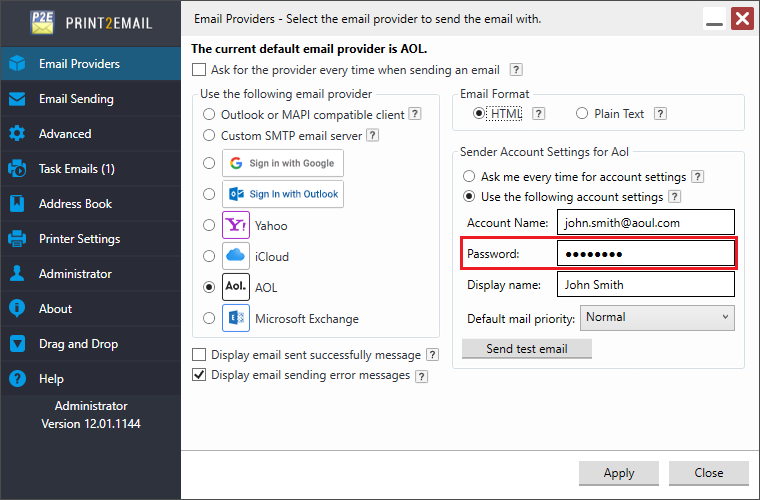
To configure the Print2Email to use AOL for sending emails every time when Print2Email converting a document, go to Print2Email > Email Providers tab > Select the AOL and uncheck Ask for the provider every time when sending an email checkbox.
If the Display email sent successfully message option is selected, the email confirmation message is displayed after successful sending the email.
If the Display email sending error messages checkbox is selected, error messages are displayed when email sending generates an error response.
Email Format
HTML – Format message as HTML. HTML message can contain formatting and are compatible with most e-mail readers.
Plain Text – Format message as plain text. Plain text can be read by everyone but contains no formatting.
Sender Account Settings
Ask me every time for account settings
Select the “Ask me every time for account settings” option, to enter the email sender account name and password every time an email is sent.
Use the following account settings
Select the “Use the following account settings” to enter the account name and password. The Print2Email will use these settings automatically every time when sending an email.
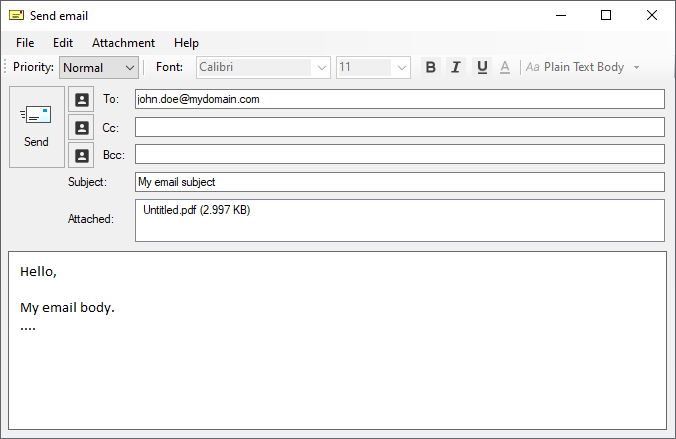
Under Authentication settings Print2Email users can also set how recipients will see the message in their email clients (for example, Outlook). The following options are available:
· Display name field does not need to be a valid email address. Display name can be any text or name of the individual or the company.
· Priority defines the importance of the email message. If the email is important, one can configure High priority for the email, and the email will be displayed as important email for the recipient.
When finished, click on the Apply button to save the changes. From now on, every document printed to the Print2Email printer driver will be opened in the Print2Email Email Sender to let users send the printed documents in email quickly and easily using the configured AOL account.
NOTE: The AOL email provider does not support saving emails into the Sent folder.
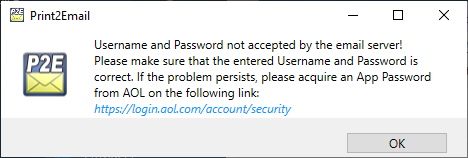
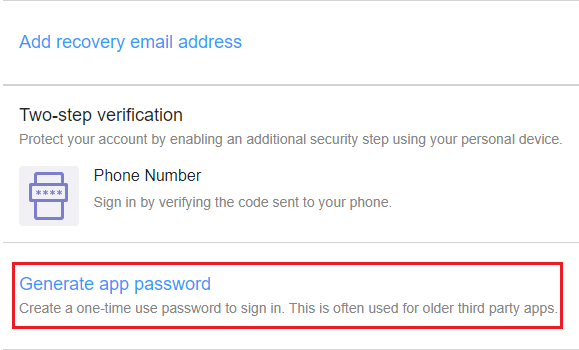
Using an App Password
If the following window appears during email sending, please follow the link on the message box to generate an App Password.
On the appearing webpage, please select the Generate app password option.
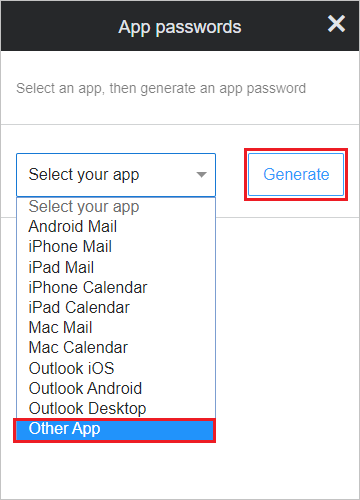
Please select the Other App option on the dropdown menu and click Generate:
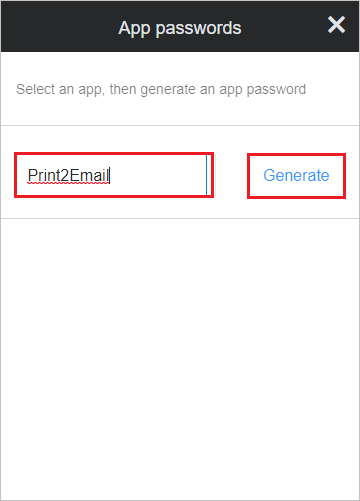
On the following window please enter ‘Print2Email’, then click Generate.
Make sure to copy the app password and click Done.
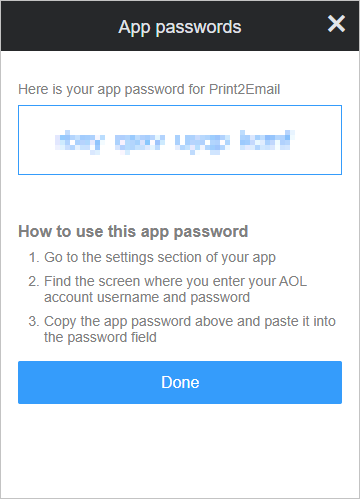
Paste the copied app password to Print2Email’s password field.