
Below you can find the most frequently asked questions about the Black Ice Print2Email. Please click on the topic to expand the details.
-
How do I activate the Print2Email?
Registering the Print2Email can be initiated by clicking on the Activate button when starting the Print2Email, or from the Print2Email Control Center > About tab.
Note: Please make sure the Print2Email application is launched with “Run as administrator” privilege.
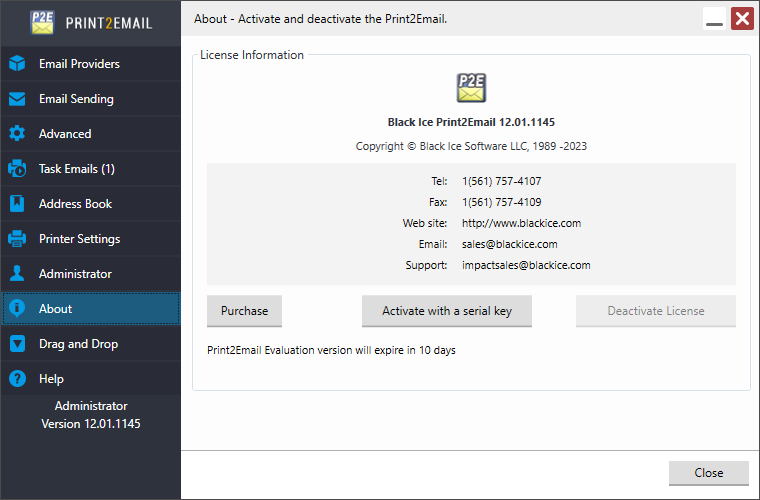
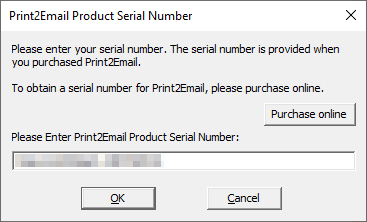
1. Click Activate with a serial key. The dialog below appears. Enter the serial number in the text field and press OK. The serial number is in the body of the email containing download instructions for the Print2Email.
2. If registration/activation is successful, the following message appears.
-
How do I activate the Print2Email if my computer is not connected to the Internet?
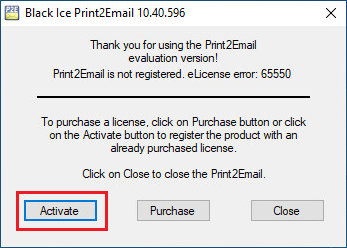
To register the Print2Email during or after the demo period, click on the Activate button on the appearing window when launching the Print2Email (registration requires administrator privileges).
A window is displayed to Enter the serial number in the text field and press OK. The serial number can be found in the email body of the containing the download instructions for the Print2Email.
NOTE: The serial number contains dashes that are part of the serial key.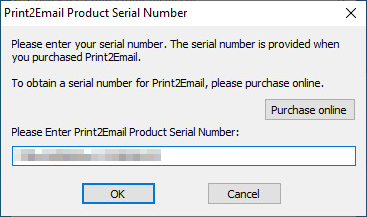
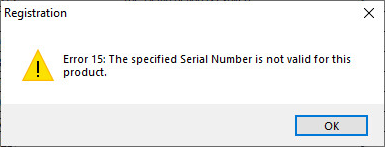
If the serial number is mistyped or incorrect, the following message appears. Click OK to enter the serial number again.
To Register/Activate the Print2Email a secure Internet connection is required to the Black Ice Software License Server through (HTTPS) port 443.
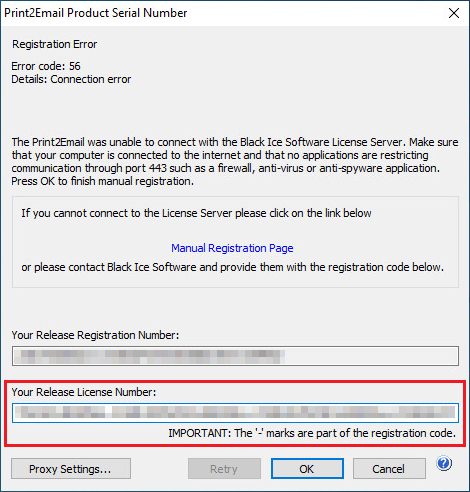
In a secured environment where servers and computers do not have an active Internet connection, Port 443 is being blocked by a firewall or in virtual machines where the network card is disabled, an “Error Code 56” or “Error Code 57” message is displayed during the registration.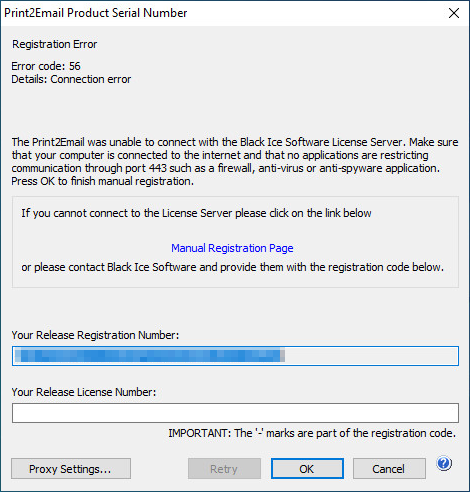
Contact the Network Administrator to enable the port 443 and press Retry to reattempt to register the product.
The Print2Email also can be registered through a proxy server. For more information please refer to the Registering through a Proxy server section of the online manual.
Manually registering the Print2Email Release
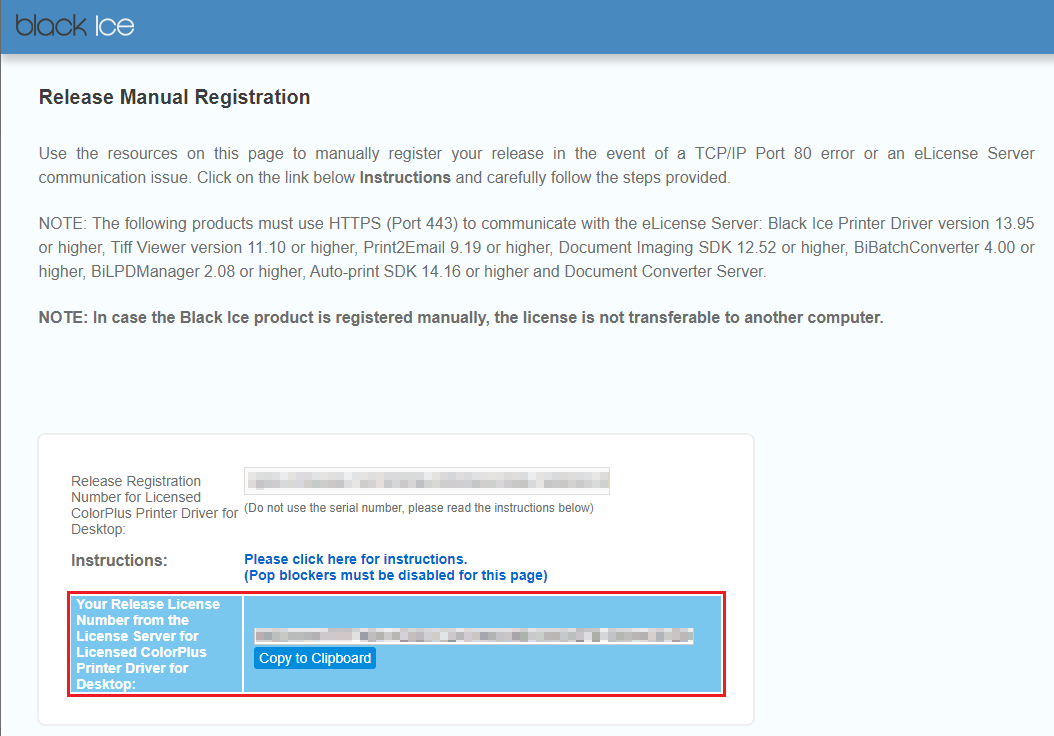
In a secured environment where the port 443 cannot be enabled, the software can be manually registered online. To receive a release license number immediately, please copy the release registration number from the installer window to the Enter your Release Registration Code field on the Release Manual Registration webpage as shown below.
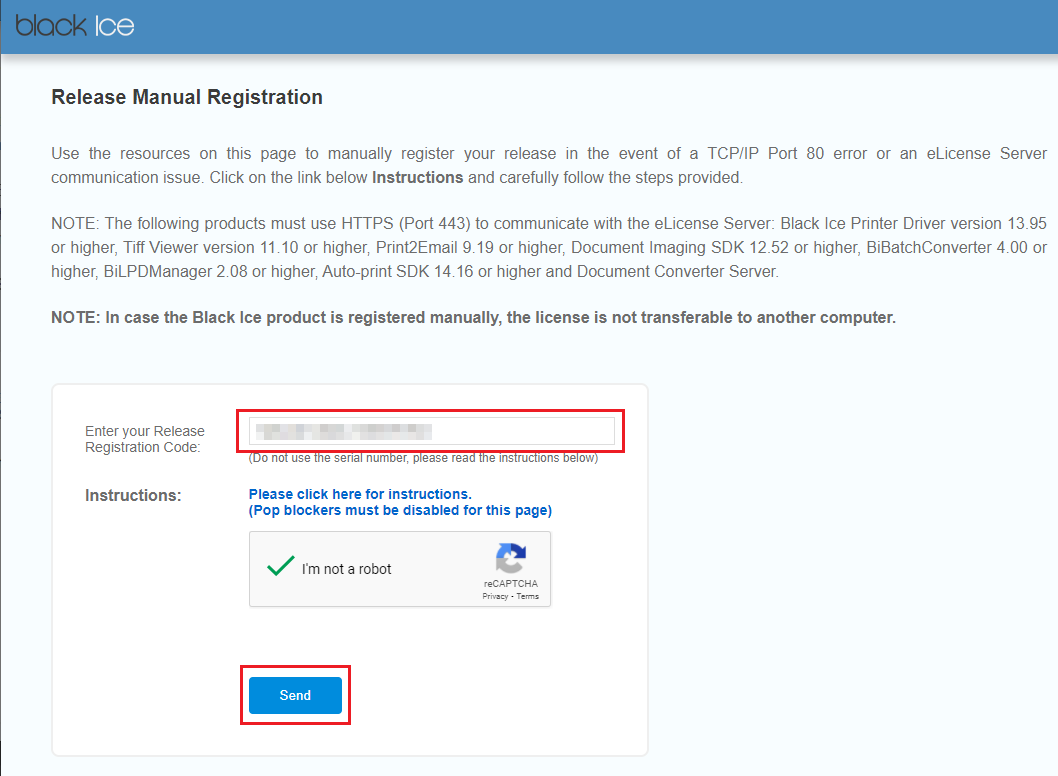
Please check the captcha checkbox and click the Send button. The following window appears:
NOTE: If one registers a transferable serial on the manual registration webpage, the license will not be transferable anymore and the license cannot be transferred to another machine.
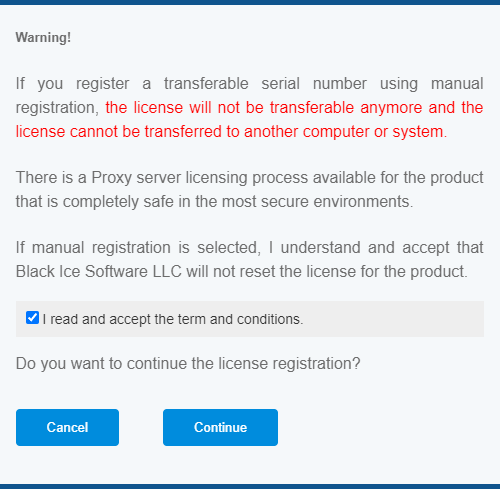
Click Cancel to abort the registration process (the license number remains transferable) or Continue to receive a Release License Number.
Please copy and paste the received license number to the Your Release License Number field on the installer window.
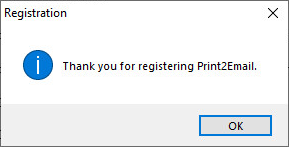
Click OK to continue the installation. If registration is successful, the following dialog appears:
Alternatively, contact Black Ice Software via impactsales@blackice.com or impactsupport@blackice.com or via telephone with the number displayed in the Your Registration Code field. Black Ice Software will provide a Release License code via email for you to paste into the Your License Number (from the reseller) field to activate the software.
Older versions of the Print2Email
Older versions of the Black Ice Print2Email (version 9.18 or lower) try to register through the port 80. If port 80 is blocked or not available, one can register using the alternate ports of 3500 or 15000.
-
Do I need to uninstall the TIFF Viewer Evaluation/Demo before installing the purchased Print2Email?
No, users can update the Print2Email without restarting the system and preserving every user configuration for the Print2Email.
In order to update the Print2Email, one has to start the installer of the Print2Email as an Administrator.NOTE: The Print2Email version 10.03 or higher can be updated with the latest release. Print2Email version 10.02 and older must be first uninstalled, reboot the system, and install the latest version.
NOTE: Updating the Evaluation version of the Print2Email is not supported.
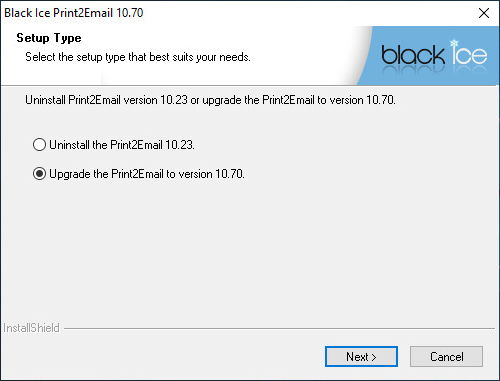
When starting the Print2Email installer the following window appears. To update Print2Email please select Upgrade the Print2Email... and click Next.
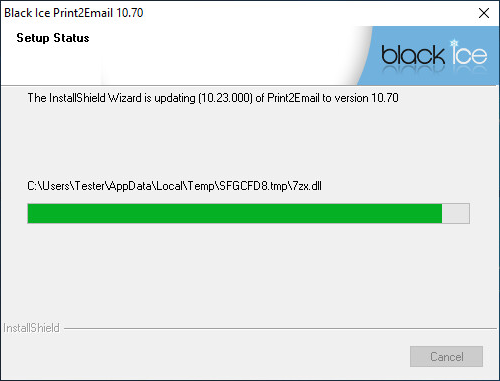
The installer will update the Print2Email, while preserving configurations.
When the update is complete the following window appears:
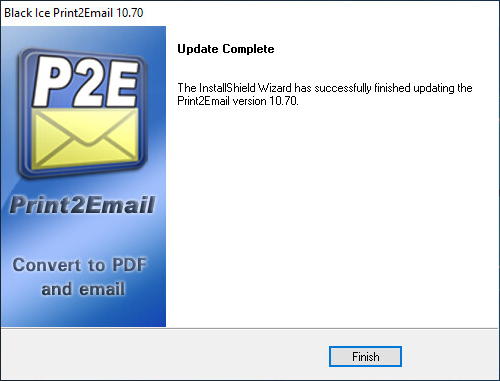
Click Finish to complete the Print2Email update.
-
Which version of the Print2Email is installed on my computer?
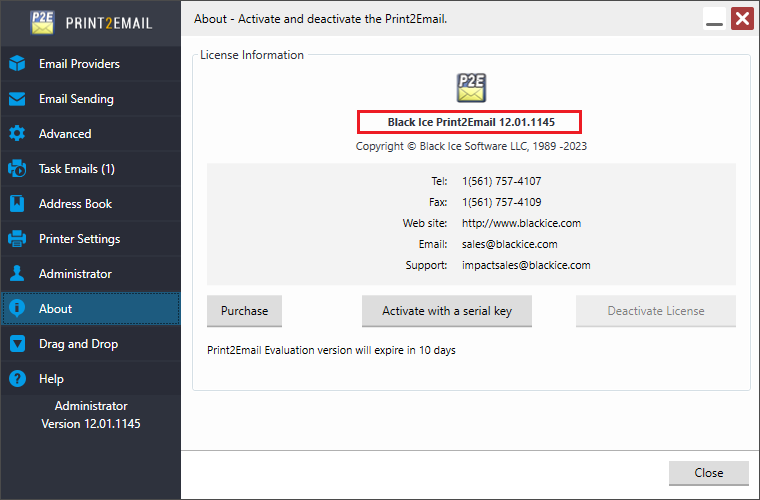
The version number of the currently installed Print2Email is available on the top of the About tab:
-
How do I upgrade to the latest version of the Print2Email?
Users can update the Print2Email without restarting the system and preserving every user configuration for the Print2Email.
In order to update the Print2Email, one has to start the installer of the Print2Email as an Administrator.NOTE: The Print2Email version 10.03 or higher can be updated with the latest release. Print2Email version 10.02 and older must be first uninstalled, reboot the system, and install the latest version.
NOTE: Updating the Evaluation version of the Print2Email is not supported.
When starting the Print2Email installer the following window appears. To update Print2Email please select Upgrade the Print2Email... and click Next.

The installer will update the Print2Email, while preserving configurations.

When the update is complete the following window appears:

Click Finish to complete the Print2Email update.
-
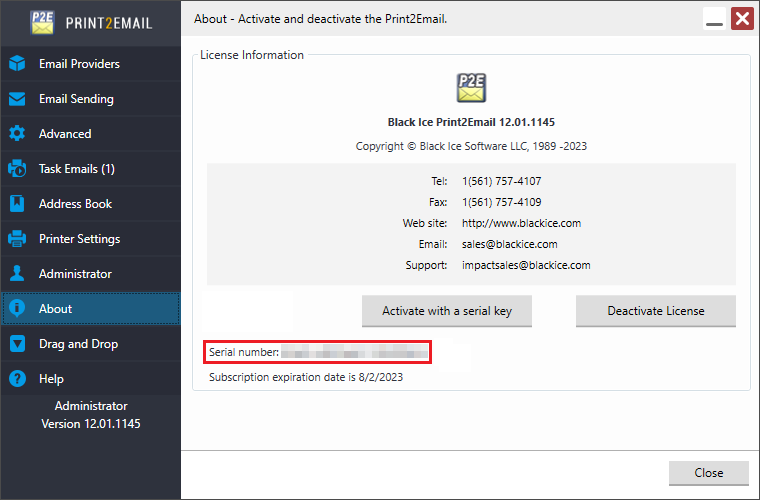
How do I find my serial number?
If the product is not activated yet, you can sign in to the Black Ice Software Customer License Management website, where you can check your available licenses and which licenses are already in use.
If the Print2Email is already activated, please navigate to the About tab of the Print2Email.
-
How do I move my license from one computer to another?
In order to move your Print2Email license to another computer, please make sure that you have a transferable license. Please see the “How do I know if I have transferable license?” section of the manual.
Black Ice Software offers two ways to move a license from one computer to another computer.
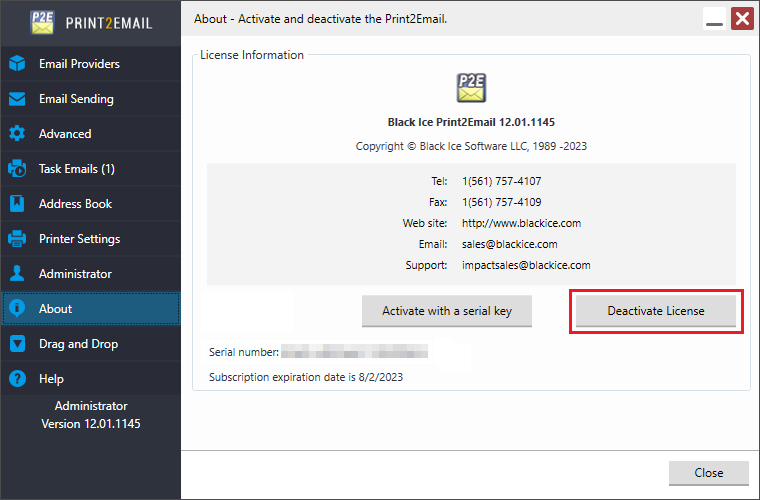
1. To deactivate and free up a license is quick and easy for IT managers in the Print2Email. The “Deactivate License” option enables IT administrators to reactivate the Print2Email on the computer at a later time.
Please Open the Print2Email, on the About tab click on the Deactivate License button to unregister/free up the license.2. Please uninstall the Print2Email from the computer to free up or unregister the license. Please go to the Control Panel > Programs and Features and uninstall the Print2Email.
3. When the license is freed up, the Print2Email can be registered on different computer with the serial number.
-
What to do when licenses are exhausted?
A single license is valid for a single PC with unlimited users. Customers can visit the Black Ice Customer License Management webpage to check how many licenses are in use. If the licenses are exhausted, users can purchase additional licenses in the online store.
Alternatively users can move an already registered license to another computer, if the product is registered with a transferable license. To read more about how to move transferable licenses to another computer, please visit the Moving transferable license to another computer section of the manual.
-
How can I send an email based on the printed document's content?
Print2Email is used to help automate email sending. Print2Email can pull the email address, subject, Bcc, Cc, email body, or/and file name from the content of the printed document to automate the email sending without any human interaction.
In Print2Email there are four main features of content-based email sending features. These four features could have many combinations with special control characters or without special control characters.
1. Enable Content Based Email sending - one has to use special control characters.
2. Use first email address from page content - does not require using a special control character.
3. Send each page as separate email - does not require using a special control character.
4. Send each page as separate email; If a page does not contain an email address, it will be printed - does not require using a special control character. -
What is a Task Email? How can I add new Task emails and how to configure them?
Task Emails allow the creation of new printers with predefined email settings based on the Print2Email printer. With Task Emails the user can create separate printers with pre-defined emails for routine tasks without having to repeat email configuration steps each time. The user can create as many Task Emails as necessary.
Add new Task Emails
Edit Task Email settings
Add new Task Emails
To create a new task email, please navigate to the Task Emails tab in the Print2Email and click the Add new button. On the appearing window, users can add a name and a description for the Task email printer driver and select if the Task email printer driver only should be created for the current user or every user on the computer. To create a task email settings for every user, please enable the Create a Task email printer driver for every user.
NOTE: Administrator privileges are required to create a task email for every user. Please make sure that the Print2Email is running under administrative privileges.
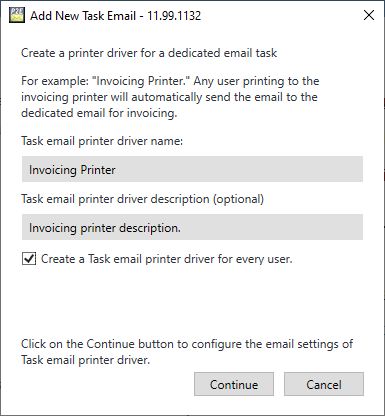
By clicking on the Continue button, the Task Email Settings window appears, where one can configure the selected task email.
When finished configuring, please click on the Save Task Email button to apply the changes.
Edit Task Email Settings
When configuring task emails as an administrator, one can choose whether to save the task email configurations for every user or only for the Administrator.
- Save Task Email for Every User - The task email configurations will be saved for every user on the computer.
- Save Task Email for the Administrator - The task email configurations will be saved only for the Administrator.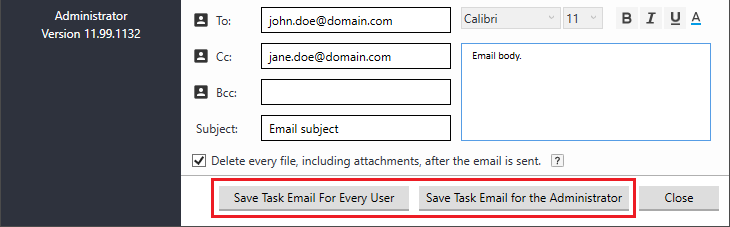
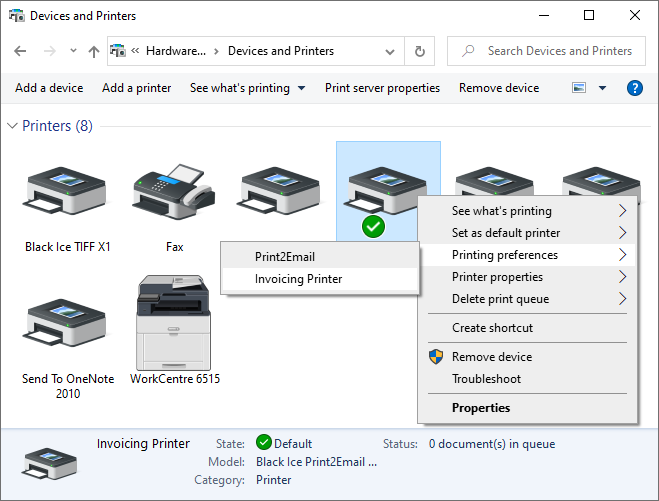
On Windows 11/10 and Windows server 2022/2019/2016/2012 the created Task Emails appear in the Control Panel > Devices and Printers in a grouped form under the Print2Email. Right-click on the Print2Email and go to Printing Properties / Printing Preferences for the Task Email.
The name and description, the email settings, and the Task email printer driver settings can be modified at any time by selecting the appropriate option on the Task emails tab of the Print2Email.

To read a more detailed description of Task emails, please see the Task Emails section of the Print2Email online manual.
-
How can I create a debug log?
The Print2Email has a built-in debug logging feature, which logs every event of the Print2Email in a log file located in the user temporary files folder.
(for example: C:\Users\[USERNAME]\AppData\Local\Temp\ BiPrint2Email2_22_2019.txt)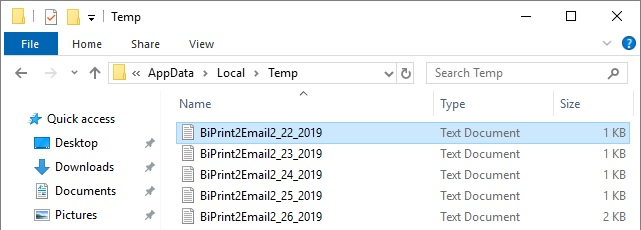
To enable users to generate debug log, open the Print2Email > Administrator tab and check the Enable Users to generate debug log checkbox.
NOTE: To enable log generation for users please run the Print2Email as an administrator.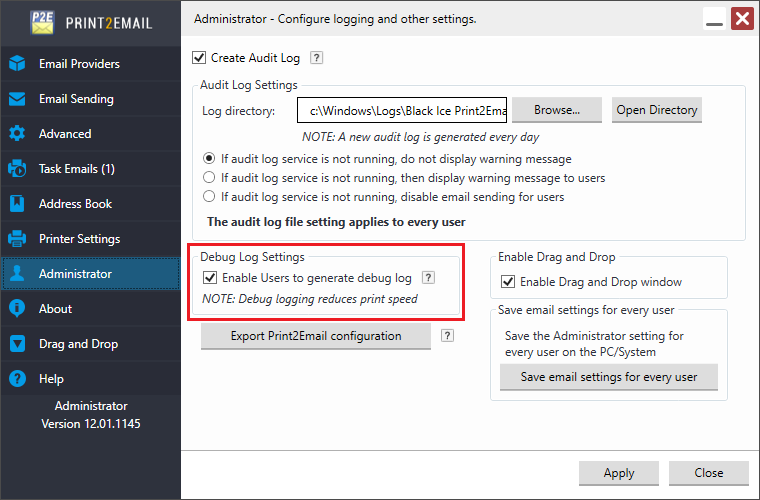
If the Enable Users to generate debug log option is checked, users can enable Debug Logging and manage the log directory on the Print2Email > Advanced tab.
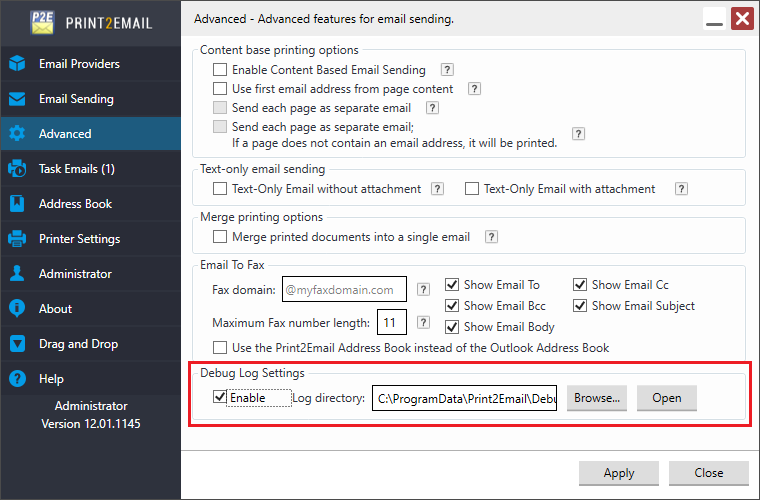
NOTE: The User must have a write privileges on the log folder to create a log file.
The Email Log contains the following information:
- Date and Time when the email was sent
- The status of the email sending
- The recipients (To, CC, BCC)
- The sent file names
- Error information
-
How to merge multiple documents into one PDF and send as an email?
The Print2Email can merge / combine multiple print jobs into a multipage file and send it in email, as long as the selected file format supports multiple pages, such as TIFF, PDF, and so on.
In order to combine multiple printing jobs, users must do the following:
Go to Print2Email > Printer Settings > File Formats tab, uncheck the Save each page as a separate file option.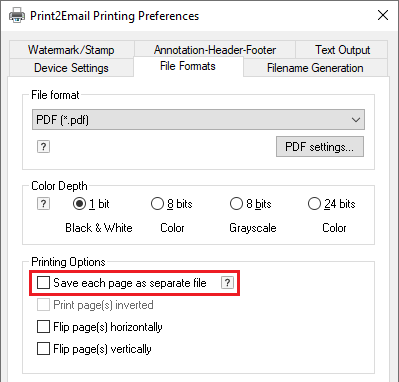
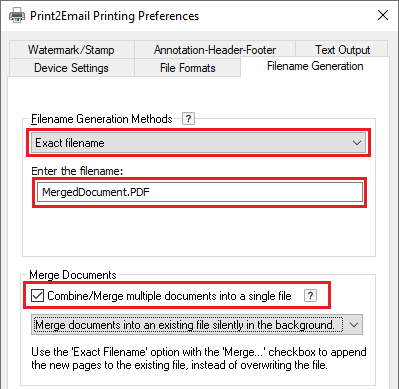
Go to the Filename Generation tab and set the Black Ice Printer Driver Filename Generation Method to one of the Exact Filename methods, such as Exact Filename.
Select a fixed document name as the output from the printer driver.
Check the Combine/Merge multiple documents into a single file option.
NOTE: If the PDF file is password-protected, appending fails.
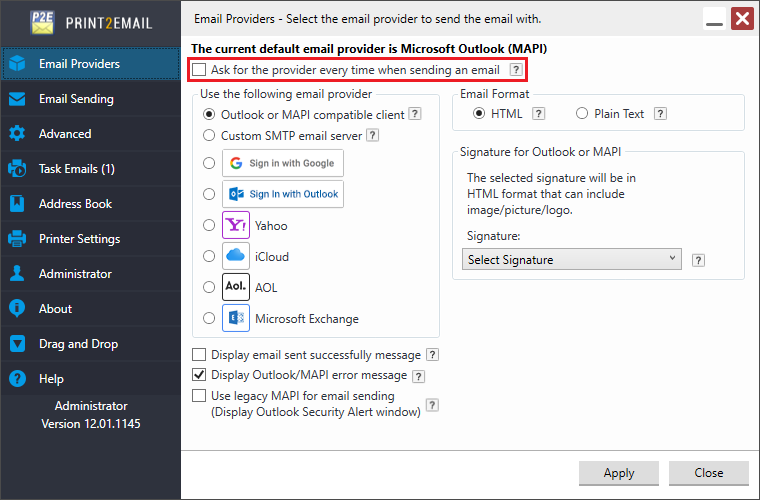
In order to merge documents, and send in email, the Ask for the provider every time when sending an email option must be disabled. To disable the option, please perform the following steps:
1. In the Email Sending tab please uncheck the Ask for the provider every time when sending an email option.
2. Go to Print2Email > Email Sending tab, and uncheck the Delete every file, including attachments, after the email is sent option.
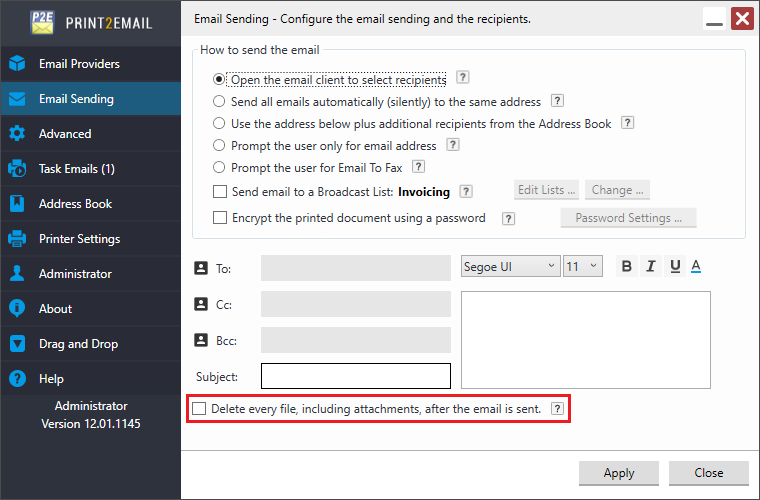
From now on, when printing multiple documents to the Print2Email and if the filename specified in the printer settings already exists, subsequent print jobs are appended to the file. If the file does not exist, the first print job creates the file and the following print jobs are appended to the file.
The Print2Email email sending window will always have the merged document in attachment field.
-
How can I send text-only emails without attachments?
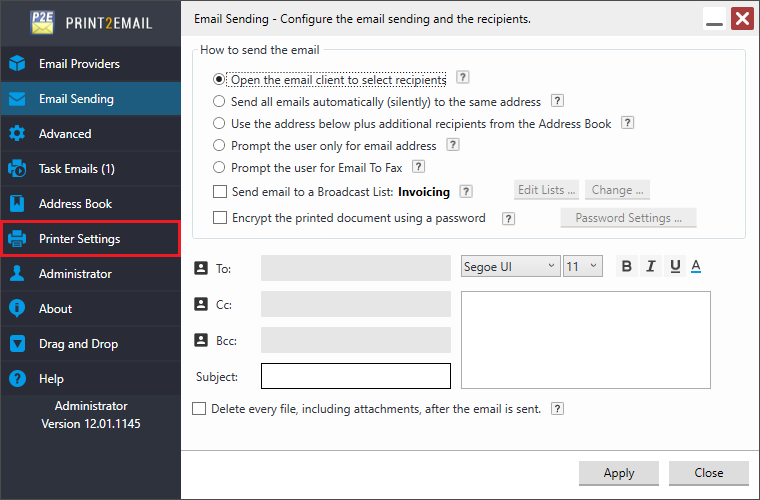
The Print2Email can be configured to extract and email the text from the printed document without any attachments. To do this, the user needs a configured email address in Email Sending / Email Providers or in SMTP Settings if the user wants to configure the email settings manually.
Go to the Print2Email Control Center > Printer Settings:
In the Print2Email Printer Settings, go to the Text Output tab, and enable the Generate Text Output option.
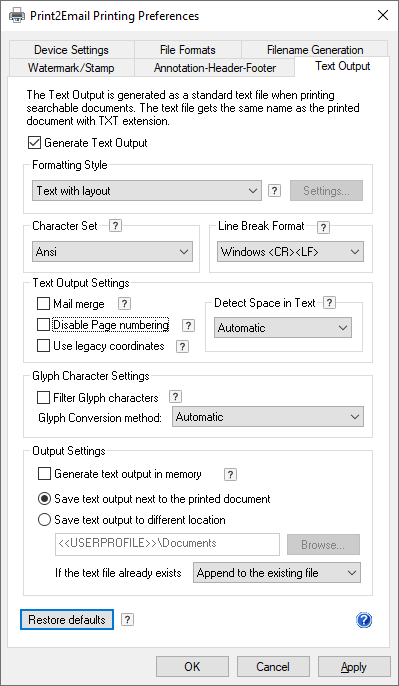
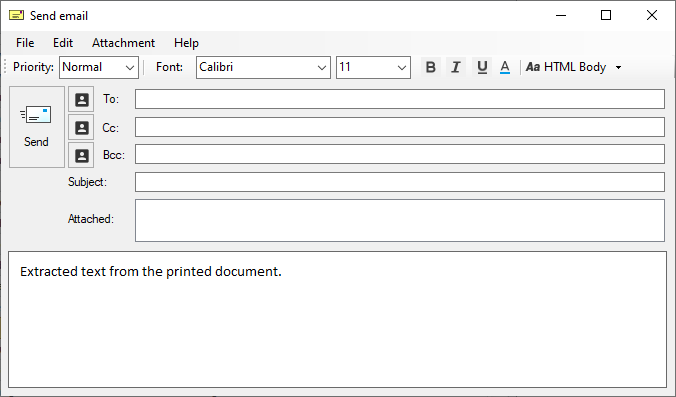
With these settings, if the user prints a document to the Print2Email, when the print job finished the email sending dialog pops up with the extracted text.
-
How can I reduce the file size of the attachment?
The attached file size generated by the Print2Email printer driver can be reduced by performing any of the following steps:
1. Please Use Compact PDF file format.
2. Reduce the Resolution (DPI) of the document from 600 DPI to 200 DPI
3. Change file format from PDF to TIFF and use one of the available compression methods. For best results for TIFF files is to use CCIT G4. For best results with PDF files use the Flate compression.
4. Lower the Bit Depth of the generated attachment, i.e. from Color - 24 bit, Color - 8 bit, Black and White - 1 bit.
-
How do I share the Print2Email Printer?
The Print2Email is shareable over the network.
To share the Print2Email Printer on the network, follow the instructions below to set up the printer sharing correctly.
NOTE: When the Print2Email is shared out from the Host to a Client, only the silent email sending is available.
Terminology:
Host: the host is where the base printer driver is installed. Client: The client is where the printer driver is shared out too.
Sharing Process:
1. Install the Print2Email printer driver on the Host.
2. Configure the Print2Email printer driver on the Host as an Administrator. The most important configuration is the Output directory for the Client.
To configure the printer driver for sharing, please click here.
When printing on the client the document conversion and output will be generated on the Host.3. If the output directory is on the Client please click here.
4. If the output directory is on the Network driver please click here.
5. Once the printer driver configured and it is tested, the printer driver can be shared out manually or through group policy.
Note: The shared printer on the client computer will be added only to the current user.
Sharing the Printer Driver on the Host
1. Before the Print2Email printer is shared from the Host, preconfigure the Printer Driver settings, navigate to Control Panel > Printers and Devices > right-click on the Print2Email > Printer Properties > Advanced > Printing Defaults and configure the printer driver. Changing the printer driver setting through the Printing Preferences will have no effect on the shared printer on the client. The shared printer on the Client can be custom-configured through Printing Defaults or Printing Preferences.
2. Before the Print2Email printer is shared from the Host, the Print2Email settings also have to be configured. Print2Email does not display email sending window when a user is trying to print from a client computer. The Print2Email only supports silent email sending on shared Print2Email printers. The silent email-sending options have to be configured on the host computer, where the Print2Email is installed.
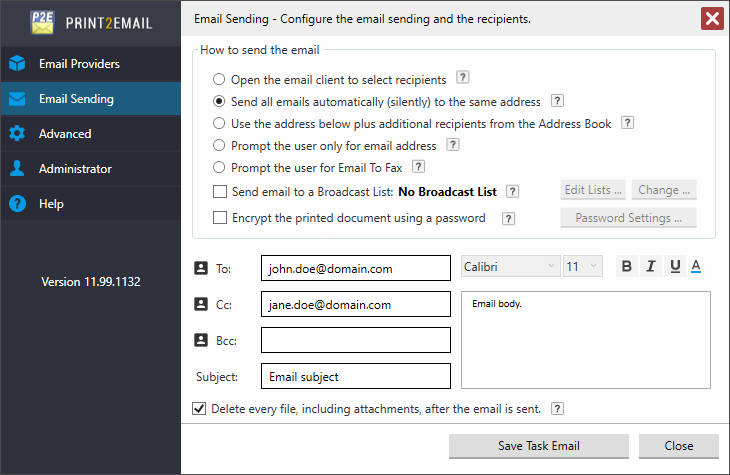
Navigate to the Email Settings, and on the General tab please select the Send all emails automatically to the same address option and set the email addresses in the To field.

3. On the Email Providers tab, one has to configure the default email provider and disable the Ask for the provider every time when sending an email option.

4. To Share a Black Ice Printer Driver, please navigate to:
On Windows 11, please navigate to Settings > Bluetooth & devices > Printers & scanners > Click on the printer > Printer properties.
On Windows 10, please navigate to Control Panel > Printers and Devices, right-click on the printer you would like to share, and click on Printer Properties.
On Windows 2016 or newer server systems, please navigate to Control Panel > Printers and Devices, right-click on the printer you would like to share, and click on Printer Properties.
On Windows 2012 and older systems, please navigate to Start > Control Panel > Hardware > Devices and Printers > Right-click on the Printer > Printer Properties.
5. On the Sharing tab, check the Share this printer checkbox, and enter a Share name. The printer will be displayed with this name on the network.

6. When finished, click on the Apply button. The Printer Driver is shared successfully.
Adding the Shared Printer to the Client Computer
Before users can attach the shared printer to their client systems, the Administrator must install the Printer Driver on each client system.
If manual installation is required, the driver packages are available in the Black Ice Print2Email Printer Driver installation directory.
[Installed Black Ice Print2Email path]\Driver\For example, the path for the Black Ice Print2Email Server Printer Driver:
C:\Program Files\Black Ice Software LLC\Print2Email Server\Driver\Installing the Driver Package Manually
To install the driver package manually on a client system, follow the steps below:
1. Log in to the client system with administrative privileges.
2. On the host, copy every file from the following printer driver installation directory:
[Installed Black Ice Print2Email path]\Driver\to a local folder on the client, for example:
C:\BlackIcePrint2Email\3. In the destination folder (C:\BlackIcePrint2Email), right-click on the INF file and select Install option from the context menu.
Example INF file for the Black Ice Print2Email Server Printer Driver: BlackIcePrint2EmailServer.inf
Once the driver package is installed by the Administrator, the shared printer can be installed by any user.
Attaching the Printer on the Client Computer
To attach the shared printer on the client computer, follow the steps below:
1. Log in with the user account that will use the printer.
2. Open File Explorer and browse to the print server using the hostname (\\hostname):

3. Enter the credentials of the host computer and please make sure to enable the Remember my credentials checkbox.
Administrator privileges are not required for this step.
4. Right-click on the shared printer and click Connect.

5. The shared printer is successfully added on the client computer.
.
Further required actions prior to Print2Email version 11.10:
Once the Shared Print2Email printer is added on the client computer, please navigate to the Admin tab and select Save settings for every user on the host computer.
Please note, the Save settings for every user button must be also pressed, every time when changing the Print2Email settings on the Host, in order to apply the changes to the shared printers on the client.
NOTE: Saving email settings for every user requires Administrator privileges.
-
How can I configure the email sender window for faxing?
To configure the email sender window of the Print2Email please navigate to the Advanced tab of the Print2Email:
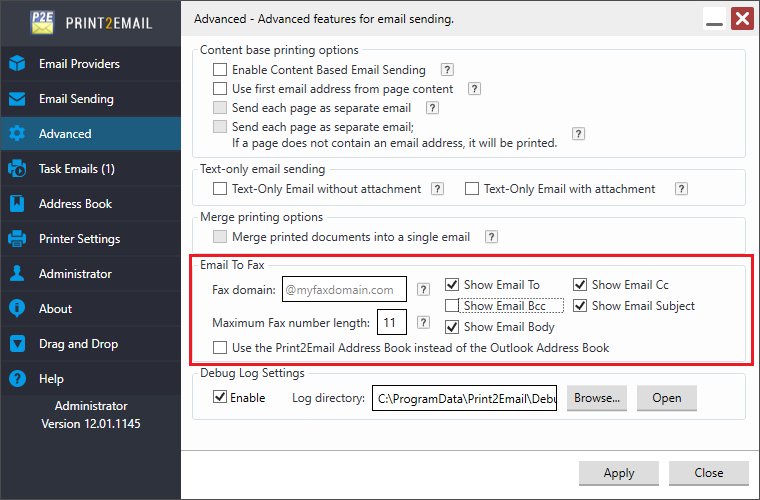
For example:
Fax Domain=@MyFax.com
Maximum Fax number length=11Note: If the ‘Maximum Fax number length’ entry is empty or set to ‘0’, the Print2Email will not validate the entered fax number.
In the example the fax domain will be set to ‘@MyFax’ by default and the fax number length will be limited to 11 digits as shown in the example below.
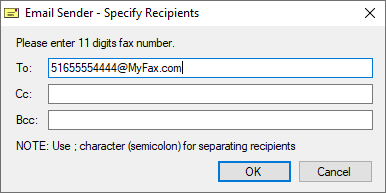
The simplified user interface can be further limited to only use the To: field, by unchecking the Cc: and the Bcc: checkboxes on the Print2Email User interface, as shown in the example below:

