Bates Numbering is commonly used in eDiscovery, as well as in legal and business sectors, to organize, reference, and manage large document collections, particularly in litigation and regulatory contexts. Bates Numbering provides a consistent method for referencing and tracking documents and pages by assigning sequential numbers, often combined with a prefix. The Bates Numbering feature in the Printer Driver consists of two components: a customizable prefix (e.g. Case Number) and a sequential number. Bates numbers are printed on each page in the specified position, using the selected font and color. The Printer Driver is capable of saving and reusing multiple configurations, allowing users to switch between the previously saved bates numbering formats as needed.
To configure the Printer Driver to automatically apply bates numbering to every printed document, please enable the Enable Bates Numbering checkbox.
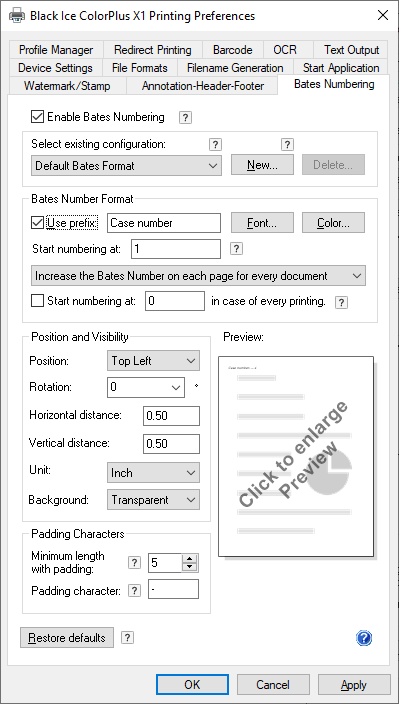
Bates Number Format configuration
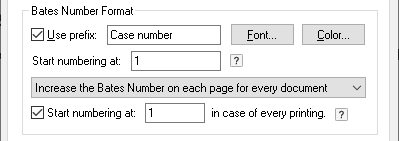
Use prefix
In the Use prefix field, a text string can be specified to appear before each bates number. The prefix is added before the bates number on every printed page.
Font
To configure the font of the bates numbering, please click on the Font… button, and specify the font family, font style and font size on the Font window.
Color
To configure the color of the bates numbering, please click on the Color… button, and specify a color on the Color window.
Start numbering at
This option allows the user to specify the starting bates number. The specified number will be used as the first bates number on the first page of the first document, and the numbering will increment from there according to the selected configuration.
For example:
If the specified number is 100 in the Start numbering at field, and the Increase the Bates Number on Each Page for Every Document option selected, the numbering will appear as follows for two documents, each with 3 pages:
Document 1:
Page 1 - Bates Number 100
Page 2 - Bates Number 101
Page 3 - Bates Number 102
Document 2:
Page 1 - Bates Number 103
Page 2 - Bates Number 104
Page 3 - Bates Number 105
For example:
If the specified number is 5 in the Start numbering at field, and the Increase the Bates Number on each document option is selected, the numbering will appear as follows for two documents, each with 3 pages:
Document 1:
Page 1 - Bates Number 5
Page 2 - Bates Number 5
Page 3 - Bates Number 5
Document 2:
Page 1 - Bates Number 6
Page 2 - Bates Number 6
Page 3 - Bates Number 6
Increase the Bates Number… dropdown
The user can configure whether to increment the bates number on each printed document or on each page within a document. The following options are available:
-
Increase the Bates Number on each page for every document
By using this option, bates numbers increment with each page. For example, if the user prints two documents, both with 3 pages:Document 1:
Page 1 - Bates Number 1
Page 2 - Bates Number 2
Page 3 - Bates Number 3Document 2:
Page 1 - Bates Number 1
Page 2 - Bates Number 2
Page 3 - Bates Number 3 -
Increase the Bates Number on each document
By selecting this option, bates numbers increase by the number of documents. For example, if the user prints two documents, both with 3 pages:Document 1:
Page 1 - Bates Number 1
Page 2 - Bates Number 1
Page 3 - Bates Number 1Document 2:
Page 1 - Bates Number 2
Page 2 - Bates Number 2
Page 3 - Bates Number 2
If the Start numbering at [ ] in case of every printing checkbox is checked, and the starting value is specified, the bates numbering starts from the specified value at every printing. This option is only available if the Increase the Bates Number on each page for every document option is selected.
For example, if the value is 3, the bates numbering starts from 3 at every print job.
Position and Visibility configuration
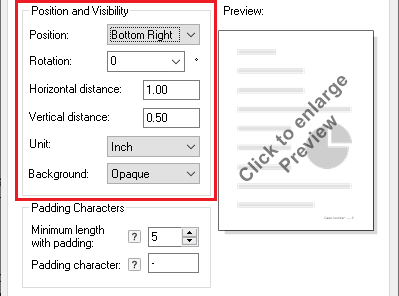
Position
The Position option specifies where the bates number will be printed on each page of the document. Users can specify the position of the bates number by selecting one of the following options: Top Left, Top Right, Center, Bottom Left, or Bottom Right.
Horizontal distance
The Horizontal Distance setting determines the distance between the bates number and the left or right edge of the page, depending on the selected position. Users can specify the distance in the Horizontal distance field, allowing for precise placement of the bates number along the horizontal axis. Increasing the value moves the bates number further away from the edge, while decreasing the value moves it closer. The distance can be specified in millimeters, inches, or pixels by selecting the unit from the Units dropdown menu.
Vertical distance
The Vertical Distance setting controls the distance between the bates number and the top or bottom edge of the page, depending on the selected position. Users can specify the distance in the Vertical distance field to precisely position the bates number along the vertical axis. Increasing the value moves the bates number further from the edge, while decreasing the value brings it closer. The distance can be specified in millimeters, inches, or pixels by selecting the appropriate unit from the Units dropdown menu.
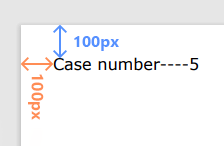
Example 1:
The position is set to the top left corner. The unit is specified in pixels. The Horizontal distance is set to: 100px. The Vertical distance is set to: 100px.
Example 2:
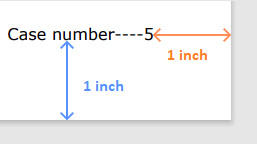
The position is set to the bottom right corner. The unit is specified in inches. The Horizontal distance is set to: 1 inch. The Vertical distance is set to: 1 inch.
Rotation
The Rotation field specifies the degree of rotation for the bates number. The value can be positive or negative, depending on the direction of rotation. A positive value rotates the bates number clockwise, while a negative value rotates it counterclockwise. Users can either select a predefined rotation angle from the dropdown menu or enter a custom degree.
Background
Specifies whether to use opaque or transparent background for the bates numbers. The following options are available:
- Opaque: The background of the bates number is opaque.
- Transparent: The background of the bates number is transparent.
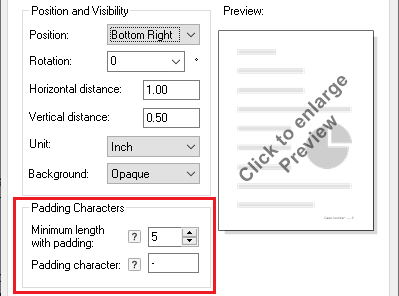
Padding Characters
Minimum length with padding
The Minimum length with padding option specifies the minimum length for the bates number. If the length of the bates number is shorter than the specified value, padding characters will be added to meet the minimum length.
Padding character
The Padding character option allows the user to specify the character used for padding. This character can be any ANSI character.
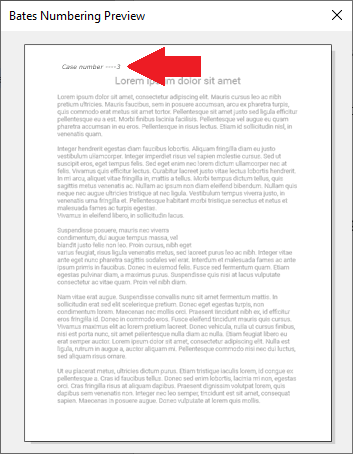
Preview
Shows a preview of the configured bates number. To enlarge the preview, please click on the preview thumbnail on the Bates Numbering tab.
Save and Reuse multiple Bates Numbering Configurations
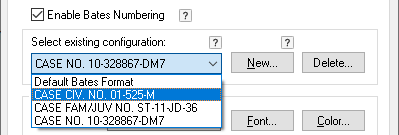
Different bates numbering formats may be required for various documents. For example, different cases might necessitate unique starting numbers, prefixes, or other customizations. The Printer Driver is capable of saving and reusing multiple configurations, allowing users to switch between the previously saved formats as needed.
To create a new bates numbering format, please click on the New… button.

On the Add New Bates Format window, please enter a name for the new format, and click on the OK button to create it. Please note, that a maximum of 30 bates numbering formats can be created, and the name of the new format must be unique.

To use an existing (previously saved) bates numbering configuration, please select the desired format from the Select existing configuration dropdown menu.
To delete a bates numbering format, select the desired format from the Select existing configuration dropdown menu and click Delete.