This page includes a step-by-step description on how to deploy MSI packages to enrolled users and devices with the help of Microsoft Intune. We use the Black Ice IceVeiwer Desktop version as an example to show the simplicity of the process.
- Install the MSI installer with the “Line-of-business app” option
- Install the MSI installer with the Windows app (Win32) option
- Sync an app to the enrolled device
- Status/Monitoring – Intune MSI Application Deployment
- Update/Upgrade an IceViewer
- Uninstall an IceViewer
Install the IceViewer MSI installer with the “Line-of-business app” option
Login to Microsoft Intune admin center.
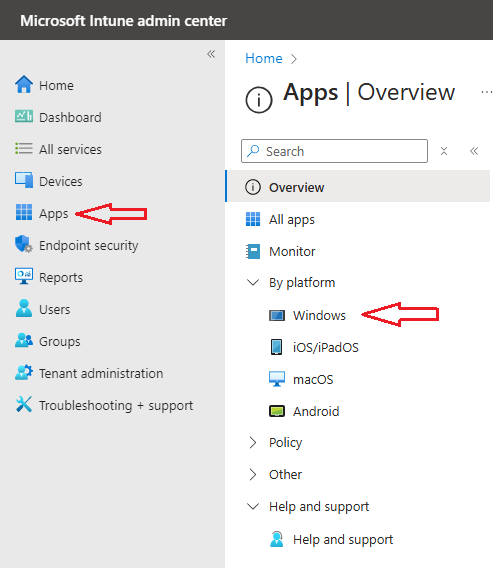
Navigate to Apps and click on the Windows option:
Click on the +Add button to add a new Intune application for deployment.

Select the Line-of-Business app option in the App Type drop-down menu.

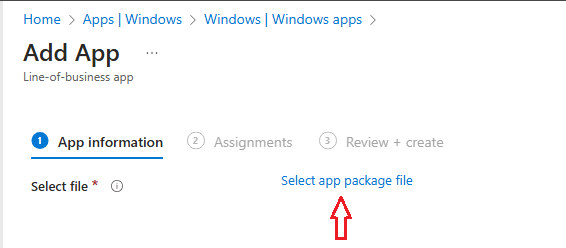
Click on the Select app package file option to upload the IceViewer64BitSetup.msi file to Intune:
In the Application package file window, check the Name settings:
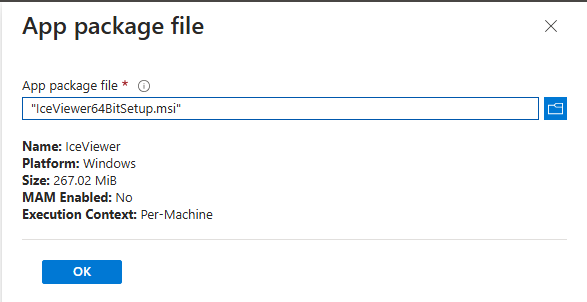
Click on OK on the App Package file window.
Click on the App Information option from Add App in Intune Application Information Details.
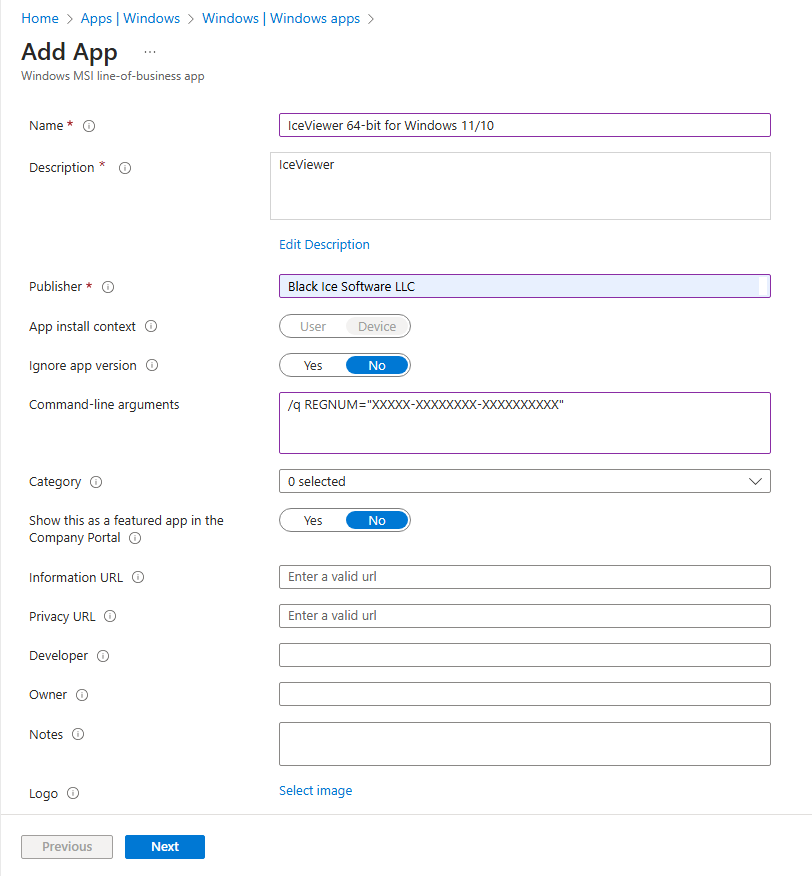
Fill in the following information details in App Information.
Command-line Argument: /q REGNUM="XXXXX-XXXXXXXX-XXXXXXXXXX"
Note: the XXXXX-XXXXXXXX-XXXXXXXXXX must be the serial number of the customer.
After filling in the information, click the Next option. The next page will appear for Intune MSI Application Deployment - Assignment Options.
Click on the Add Group button from the Assignment tab of the application created.
Select groups where you want to assign this app from Add Group.
There are three Assignment types - Select one assignment type.
You can deploy the MSI application to some group of devices or users as required.
The MSI application is per machine then it will get installed in the machine context.
Select Required or Available for Enrolled Devices.
Click on Included Groups from Add Group.
Select the groups you want to make this app required or available from Assign. Click on Select Groups to select a Group for the required assignment from Assign. Search the Device/user Group in the search option in Select Groups and select the DEVICE/USER group that you want to deploy.
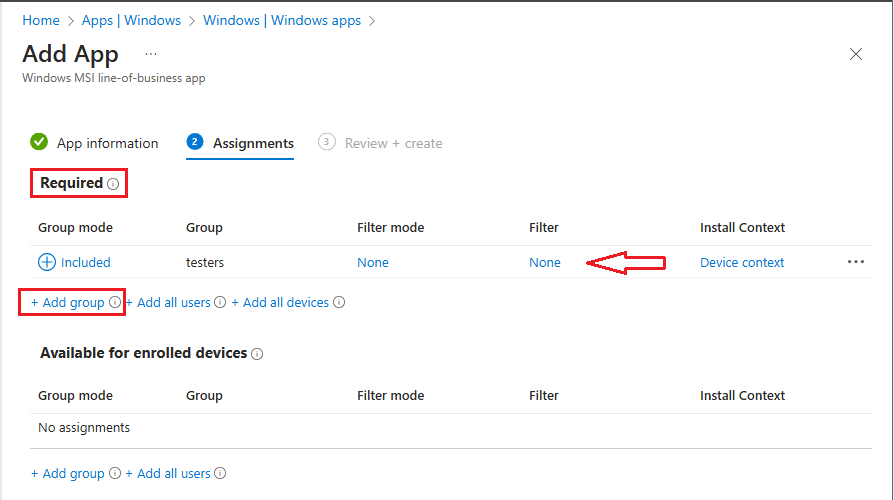
Click Next to save the Assignment.
On the next page, review the values and settings you entered for the app.
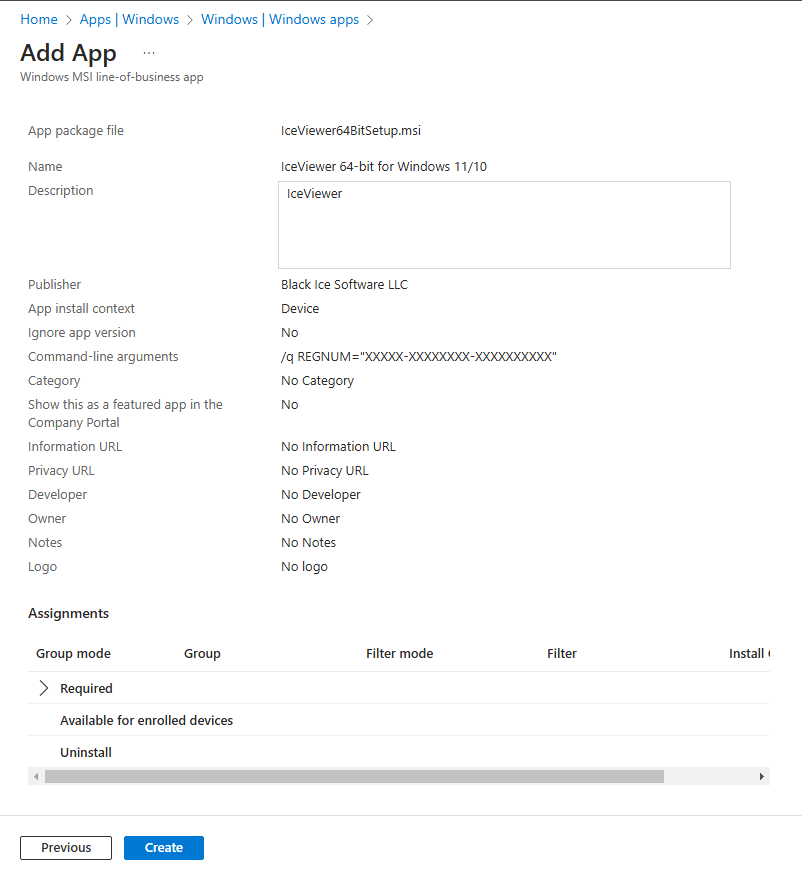
When you are done, click Create to add the app to Intune.
Install the IceViewer MSI installer with the “Windows app (Win32)” option
First, the .MSI package needs to be converted into an .INTUNEWIN format so it can be uploaded to Intune.
Download the Microsoft Win32 Content Prep tool from Microsoft’s official link. This tool is essential for converting your .MSI files into .INTUNEWIN format, suitable for Intune.

Organize Your Files: Create a dedicated folder, such as ‘Microsoft Win32 Content Prep’, and within it, establish Source and Output subfolders for better management of the original and converted files.
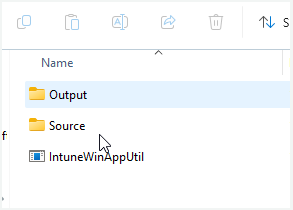
Run the IntuneWinAppUtil tool with the following parameters:
IntuneWinAppUtil.exe -c "C:\Microsoft Win32 Content Prep\Source" -s "IceViewer64BitSetup.msi" -o "C:\Microsoft Win32 Content Prep\Output"
The Output folder contains the .INTUNEWIN file for installation.
Login to Microsoft Intune admin center.
Navigate to Apps and click on the Windows option:
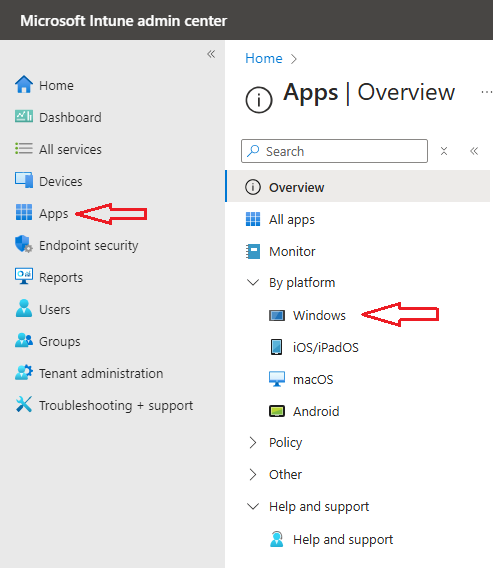
Click on the +Add button to add a new Intune application for deployment.

Select the Line-of-Business app option in the App Type drop-down menu.
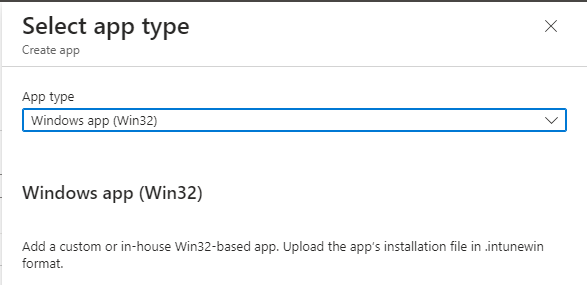
Click on the Select app package file to upload the IceViewer64BitSetup.intunewin file to Intune:

On the App package file window, check the Name settings:
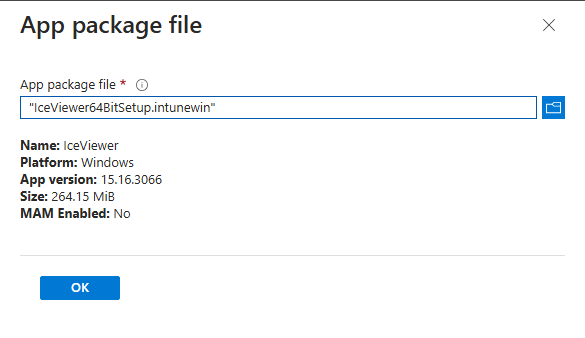
Click on the OK button on the App Package file window.
Click on the App Information option from Add App in Intune Application Information Details.
Please specify the Publisher field.
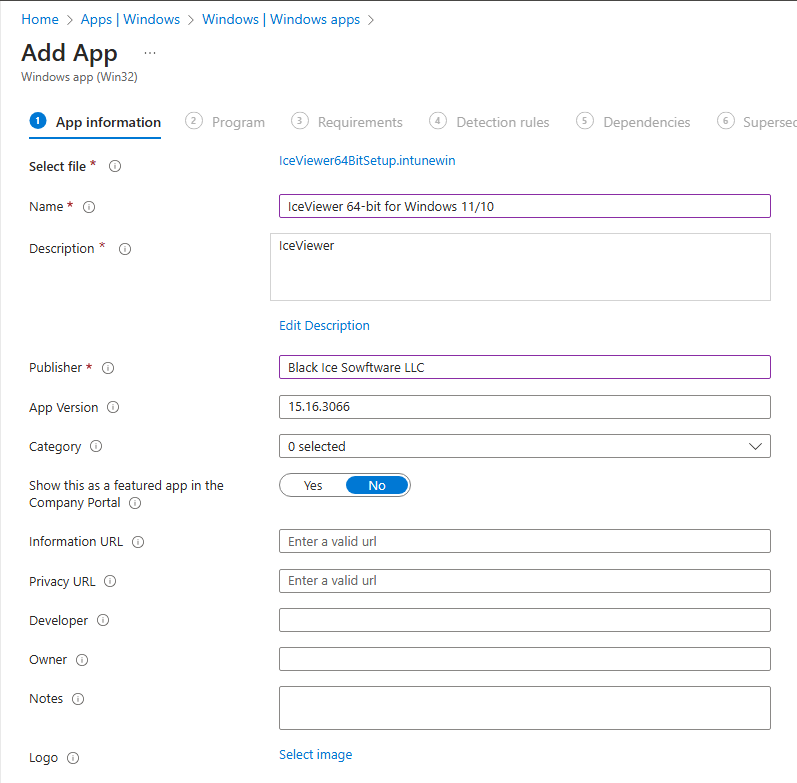
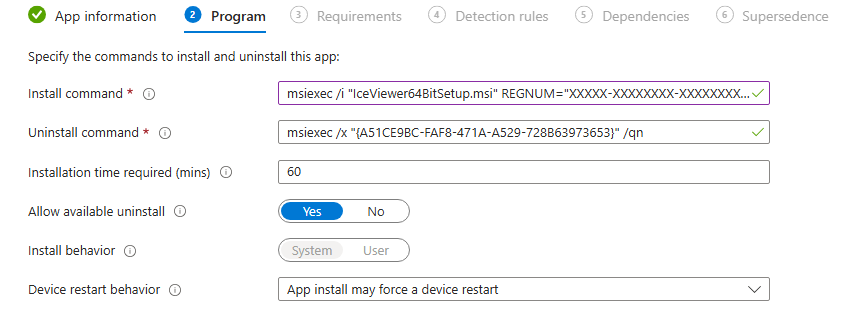
The Intune automatic field is the Install and Uninstall command field.
Important: Add the REGNUM="XXXXX-XXXXXXXX-XXXXXXXXXX" to the Install command field.
Note: the XXXXX-XXXXXXXX-XXXXXXXXXX must be the serial number of the customer.
On the Requirements page, specify the rules for the app to be installed on the device. In this case, a 64-bit operating system is required for the OS architecture. The minimum supported operating system version is Windows 10 (version 1607). Please specify the best choices based on your company’s needs.

Next, the Detection rules allow us to check the device to see whether the application being deployed is already on that device or not. If the application version is already on that device, it will not install. However, if nothing is detected it will go ahead and deploy. There are two options: one is to Manually configure detection rules and the other is to use a custom detection script. We will use Manually configure detection rules > + Add:

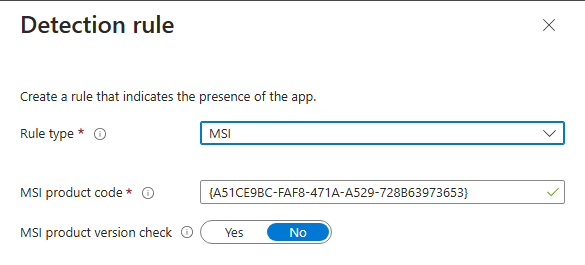
There are three Rule types to choose from: MSI, File, and Registry. Since we used an MSI package, it will automatically populate the MSI product code, so we will go ahead and click MSI.
See the rule here requires using the MSI Product code and I have the option to use the MSI Product version check. We will not need it in this case.
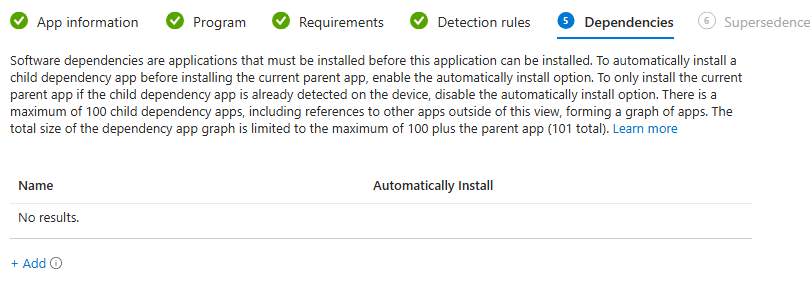
Next, Dependencies enables us to add apps that might need to be paired together for this application to be installed. We are selecting no dependencies in this case.
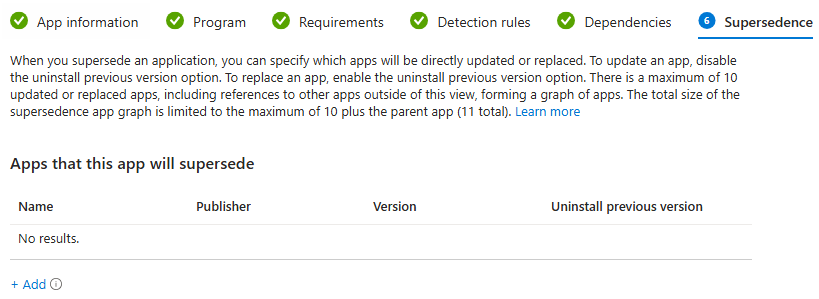
Next, Supersedence enables us to specify which apps will be either updated or replaced.
Note: If you want to update an app, disable the Uninstall previous version option. If you want to replace an app, however, you can enable that choice. In this case, there is nothing under Supersedence, but I may write another blog on this topic shortly if people are interested.
The next page will appear for Intune MSI Application Deployment - Assignments Options.
Click on the Add Group button from the Assignment tab of the application created.
Select groups where you want to assign this app from Add Group.
There are three Assignment types - Select one assignment type.
You can deploy the MSI application to some group of devices or users as required.
The MSI application is per machine then it will get installed in the machine context.
Select Required or Available for Enrolled Devices.
Click on Included Groups from Add Group.
Select the groups you want to make this app required or available from Assign.
Click on Select Groups to select a Group for the required assignment from Assign.
Search the Device/user Group in the search option in Select Groups and select the DEVICE/USER group that you want to deploy.
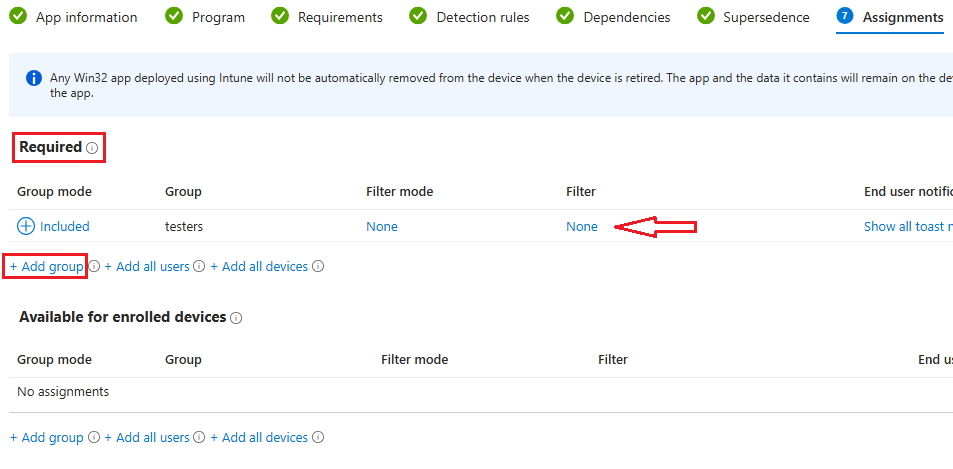
Review your MSI installation and click Create when you are ready.
Sync an app to the enrolled device
Once the application is deployed from Microsoft Intune, it can be synced to a device by following the steps below:
Go to an enrolled device, in our case we used a Windows 11 machine.
Right-click on the Windows icon and then go to Settings.
Click on the Info button.

Click on sync for syncing apps and policies.
Click on Accounts > Access work or school.
Optional: Restart your machine if the app does not appear on your device.
Status/Monitoring – Intune MSI Application Deployment
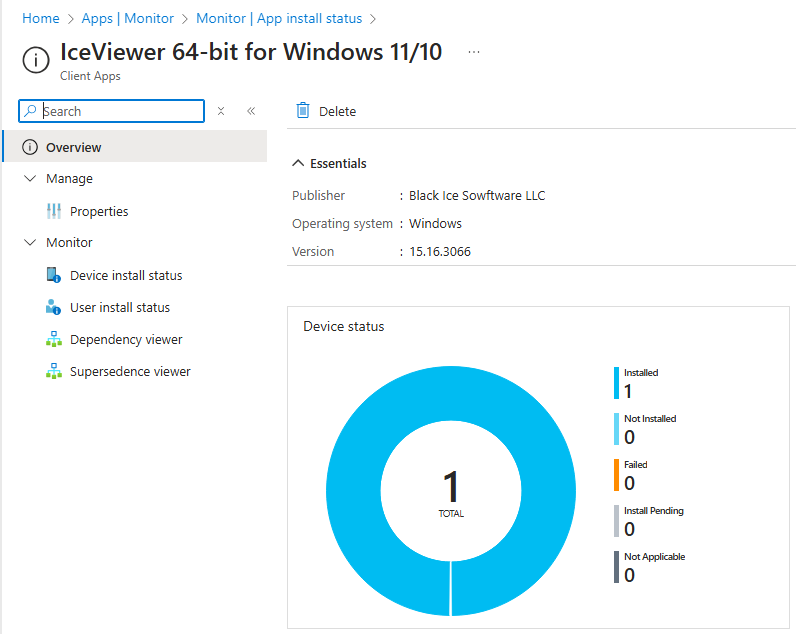
You can check the state of the deployed application.
Navigate via Microsoft Intune - Apps > Monitor.
Click on App Install Status option and select the application you want to know the status of the application.
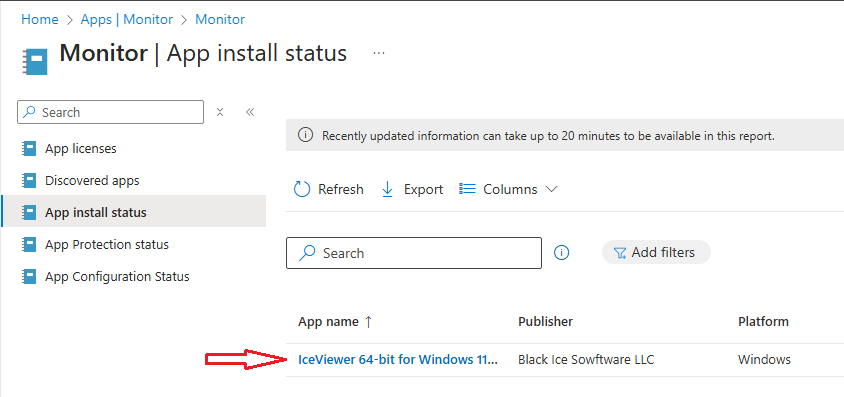
From the application (this will be in the application name), click on Overview to get a graphical view of the MSI application deployment status.
Update/Upgrade an IceViewer
Intune will automatically reinstall, update, or remove a required app based on the following conditions:
- If an end user uninstalls an app that you have required to be installed on the end user's device, Intune will automatically reinstall the app.
- If a required app install fails or somehow the app is not present on the device, Intune evaluates compliance and reinstalls the app.
- If the admin deploys uninstall intent and the app is present on the device and failed to uninstall, Intune evaluates compliance and uninstalls the app.
When you need to update or upgrade an already installed app, use the following steps:
Navigate via Microsoft Intune – Apps > All apps.
Find and select your app from the list of apps.
Select Properties under Manage from the app pane.
Select Edit next to App information.
Click on the listed file next to Select file to update.
The App package file pane is displayed.
Uninstall an IceViewer
When you need to uninstall an app from a user's device, use the following steps:
Navigate via Microsoft Intune – Apps > All apps > IceViewer > Manage > Properties > Assignments > Edit.
In the Add group pane, select Uninstall.
Select Included Groups to select the groups of users that are affected by this app assignment.
Select the groups that you want to apply the uninstall assignment.
Click Select on the Select groups pane.
Click OK on the Assign pane to set the assignment.

Note: If you want to exclude any groups of users from being affected by this app assignment, select Exclude Groups.

Select OK in the Add group pane.
Select Review and Save in the app Assignments pane.