The IceViewer TIFF and IceViewer Pro provides several easy-to-use page organization and file operations for TIFF images like extracting, inserting, deleting, moving pages, and merging or splitting documents.
The following options are available:
Extract Page(s)
The Extract Page(s) tool lets the user extract (cut or copy) any number of pages from the currently opened multipage TIFF file into a newly created file.
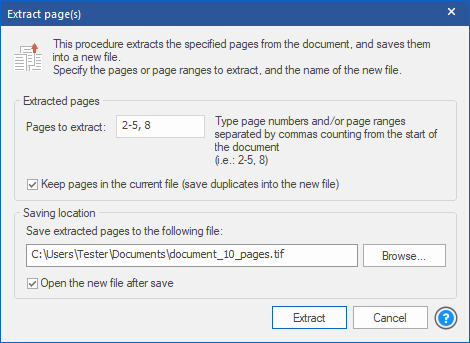
Pages to extract
One can specify the page(s) or page range(s) that will be saved into the newly created file, by typing the page number(s) or page range(s) in the Pages to extract field separated by commas.
Keep pages in the current file
To keep the extracted pages in the opened document, please make sure the Keep pages in the current file option is enabled.
Saving location
The IceViewer automatically generates a name for the new file when the dialog opens. One can change this by editing the Saving location field directly or pressing the Browse... button and navigating to the desired folder.
Open the new file after save
If the Open the new file after save option is checked, the saved file will be opened in a new IceViewer window.
Insert Page(s)
The Insert Page(s) feature enables users to add a particular or every page of a document to the currently opened TIFF file, either before or after a designated page.
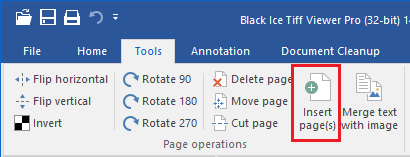
On the Insert Image(s) window one can select the position of the inserted page(s).
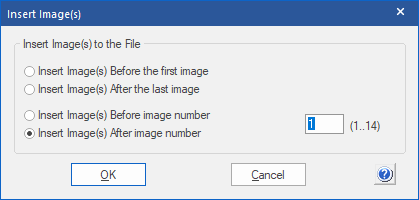
The following options are available:
- Insert Image(s) Before the first image option inserts the page(s) before the first page of the opened document.
- Insert Image(s) After the last image option inserts the page(s) after the last image of the opened document.
- Insert Image(s) Before image number inserts the pages before the specified page number.
- Insert Image(s) After image number inserts the pages after the specified page number.
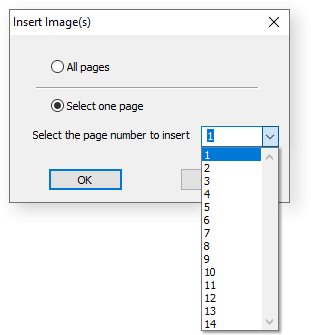
If the position is selected, click on the OK button and select the file to be inserted on the Open Image File window and click on the Open button.
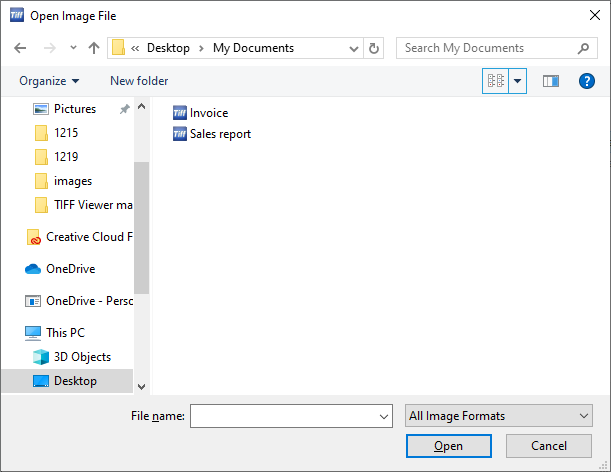
Specify whether to insert all pages or only a specific page of the selected document.
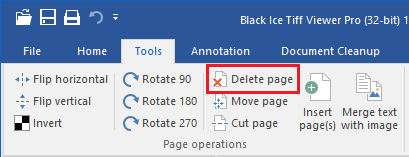
Delete page
To delete the selected page, please click on the Delete page option. To delete multiple pages at once, please hold the Ctrl key and select the desired pages to delete with the left mouse button in the thumbnail sidebar and click on the Delete page option.
Move Page
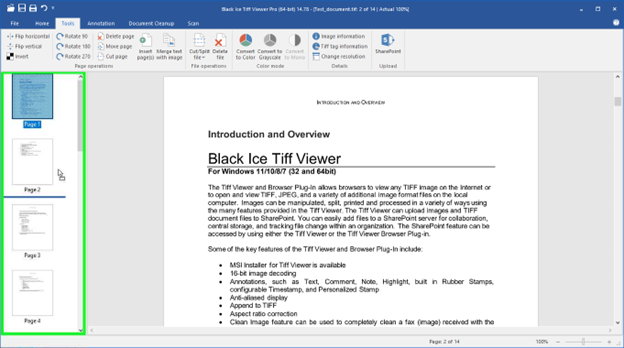
One can move pages in a document by simply drag and drop the page to the new location in the thumbnail view:
Alternatively, users can move the pages by using the Move page feature on the Tools toolbar.
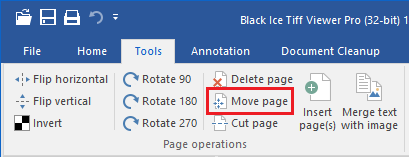
By clicking on the Move Page option, the Move Page window appears where one can move an image from one position to another in a multipage file.

In the example above the 1st page is moved to the 3rd position. It means that the 2nd page becomes the 1st, the 3rd becomes the 2nd, and the 1st becomes the 3rd in a 14-page TIFF file.
| Before | After |
| 1 | 2 |
| 2 | 3 |
| 3 | 1 |
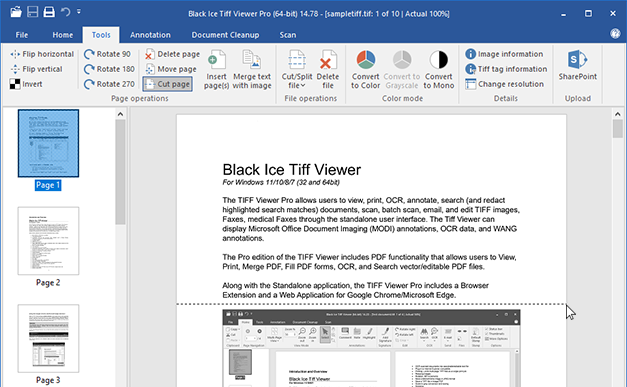
Cut page
The Cut page option allows one to cut a page at a specific point on the image.

By selecting this option, the user can select a vertical point on the page to split the page into two separate files.
Split file
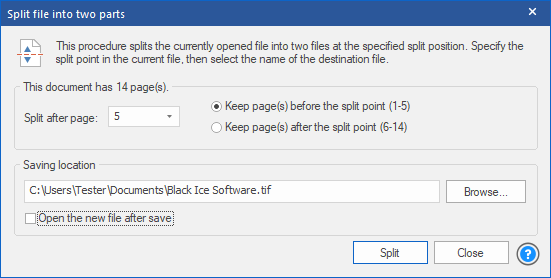
The Split file into two parts tool allows to split the currently opened TIFF document into two separate files. One can choose which part of the document is kept in the current file, and which part goes into the new file.
Split after page
One can specify a split point (page number) where the opened file will be separated. To specify a split point, enter the desired page number in the Split after page field. By default, the split point will be after the currently viewed/selected page.
Keep page(s) before or after the split point
To select the part of the document that one wants to keep in the currently opened document, please use the Keep page(s) before the split point and Keep page(s) after the split point options. The numbers at the end of the options update automatically when selecting a split point, showing which pages will remain in the current file after the split. The rest of the pages will be moved to the new file.
Saving location
The IceViewer automatically generates a name for the new file when the dialog opens. One can change this by editing the Saving location field directly or pressing the Browse... button and navigating to the desired folder.
Open the new file after save
If the Open the new file after save option is checked, the saved file will be opened in a new IceViewer window.
Cut file
The Cut into pages tool allows the users to cut the currently opened multipage TIFF file into multiple single-page files, and save them into a specified folder.
This feature does not modify the current document, it copies every page to a new file, without removing them.
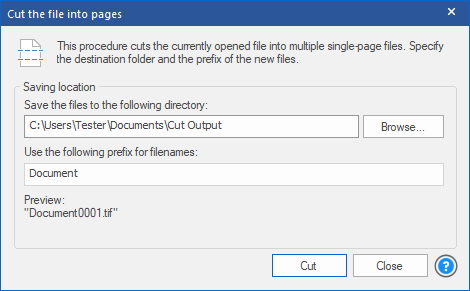
The user must specify the destination folder for the newly created files in the first text field, either by typing in the path or by pressing the Browse... button and navigating to the desired folder.
The user must also specify the prefix in the second text field, which will be used to generate the names of the saved files. The filename preview under the text field is updated every time the prefix is changed and shows the name of the first file to be saved.