Black Ice Printer Drivers are fully compatible with Citrix XenApp and XenDesktop and can be installed on the Citrix XenApp Server easily as on any Windows operating system.
Users can log into the Citrix XenApp Server any time from their Android devices and print documents from the published applications (For example: MS Word, MS Excel, Notepad) to the installed Black Ice Printer Drivers.
By printing to the Black Ice Printer Driver on Citrix XenApp Server, users can Save As the Printed documents back to the Android device's storage, which means Users can create PDF, TIFF, JPEG and other commonly used document formats with the Black Ice Printer Driver by using only their Android device.
Please see the step-by-step description below:
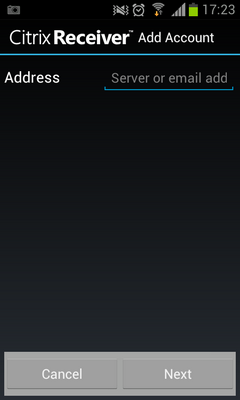
Step 1:Download and Install the official Citrix Receiver Application from Google's Market, and Start the Application.Provide the Citrix Server or email address. (for example: citrix.domain.com) |
|
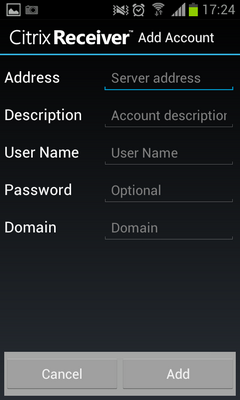
Step 2:The application checks the provided Citrix Server address.Enter a description, then provide the Username, Password and Domain for the Citrix Server. |
|
Step 3:The Citrix account added successfully.Tap on the newly added Citrix account. |

|
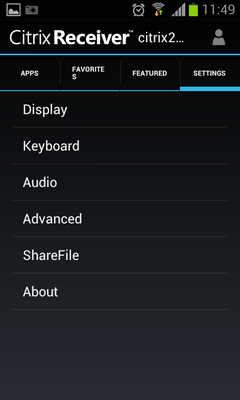
Step 4:When successfully logged into the Citrix Server,tap the Settings Tab menu > Advanced option. |
|
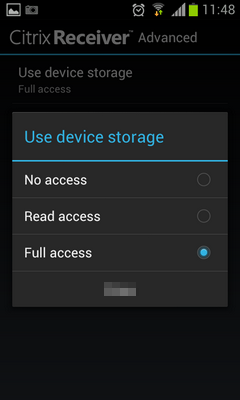
Step 5:In the Advanced options, tap the Use Device Storage option and select Full Access.This step is necessary to save the printed documents on the Android device's storage! |
|
Step 6:Tap the Apps Tab to see the available published applications on the Citrix server, and select the application you would like to use for creating/printing a document. |
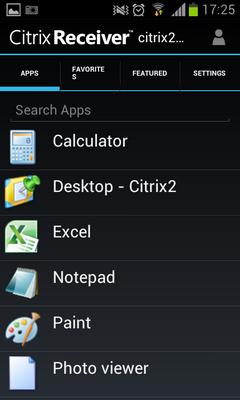
|
Step 7:Edit/Open the document.When finished editing, tap on the File menu > Print... option. |
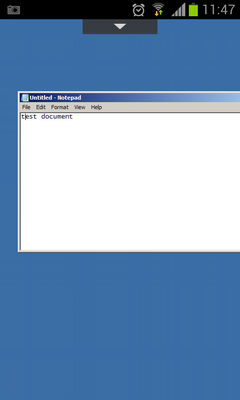
|
Step 8:Select the Black Ice Printer Driver, and click on Print button.Please Make sure the Enable Save As Option is checked in the Printer Driver Printing Preferences > Filename Generation Tab > Enable Save As Option. |
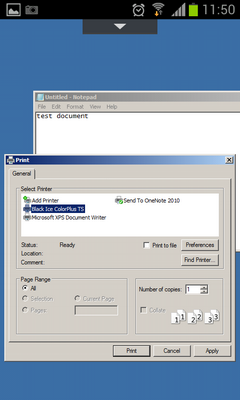
|
Step 9:The Printer Driver's Save As window appears.Select the device's storage from the Other category. |
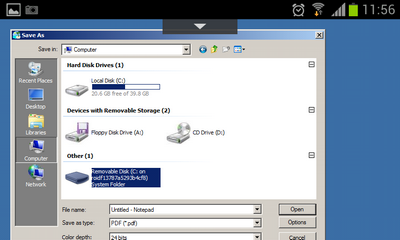
|
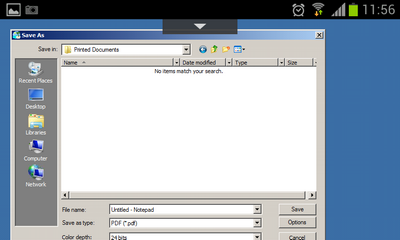
Step 10:Browse the directory from the device's storage to save the printed document, and click on Save button. |
|
Step 11:The printed document is saved and can be viewed on the device's storage. |

|